

GM body rot is great isn't it? Although my truck wasn't terrible, it wasn't good and I couldn't pay someone to fix it, and I didn't want to watch my truck rot into nothing. So I figured I'd fix her myself. Just a brief background; I am in my fifth year of aerospace engineering and not made of money, and I grew up in rural Indiana in the heart of farm country where I have spent my life working. My best friend's father has a full shop that is used for maintenance and repair of the farm equipment as well as vehicles, with a lift, a pit, and lots of tools including air compressor, welders, torches, etc. My girl is a 2004 extended cab LS model, and over the years, I've been patching the rockers, attempting to make them last as long as possible until I was done with school and can do a full replacement. It was clear however that I could no longer do that, being that the rocker on the driver side actually ceased to exist from halfway down the front door until the cab corner. That and I could very gently kick holes in the passenger side. I did my research, and decided that a rocker patch versus a full replacement was more doable, so I decided upon that. I personally am not a professional welder or automotive or auto body mechanic in any way. However, being an engineer, I am naturally good with my hands, and possess a knowledge of how to work with things and build things. What I do not know, I teach myself. Knowing that body rot is a well known and expensive problem on these trucks, I figured I'd post up with my repair so as to help anyone interested in taking this on themselves or anyone wanting to know what all it entails. I stress that I am not a professional though, and I am fully aware that my method may upset other professionals, and for that I apologize. What follows is a quick run-down of it all.
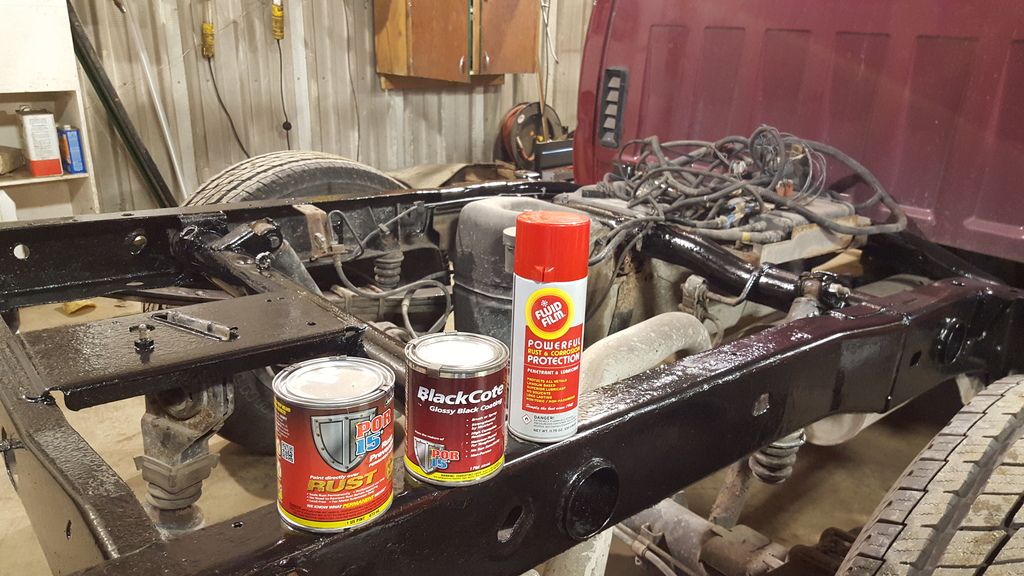
First and foremost, to work on the cab corners, you really need to remove the bed, which is easier than it seems. There are eight bolts that bolt it to the frame, and then two bolts and a push plug that hold the gas tank fill neck to the bed. Remove them all as well as the tail lights and the clips up under the bed that hold some of the wiring to the rear lights, and the bed lifts right off. Grab four people, and set up some saw horses with 2x4's to set it on and that parts done. Since the bed was off, I also took the opportunity to completely grind down and coat the back part of the frame in POR15 to prevent further frame rust. I swear by POR15 and advise it to anyone who asks me how to fix and prevent rust.
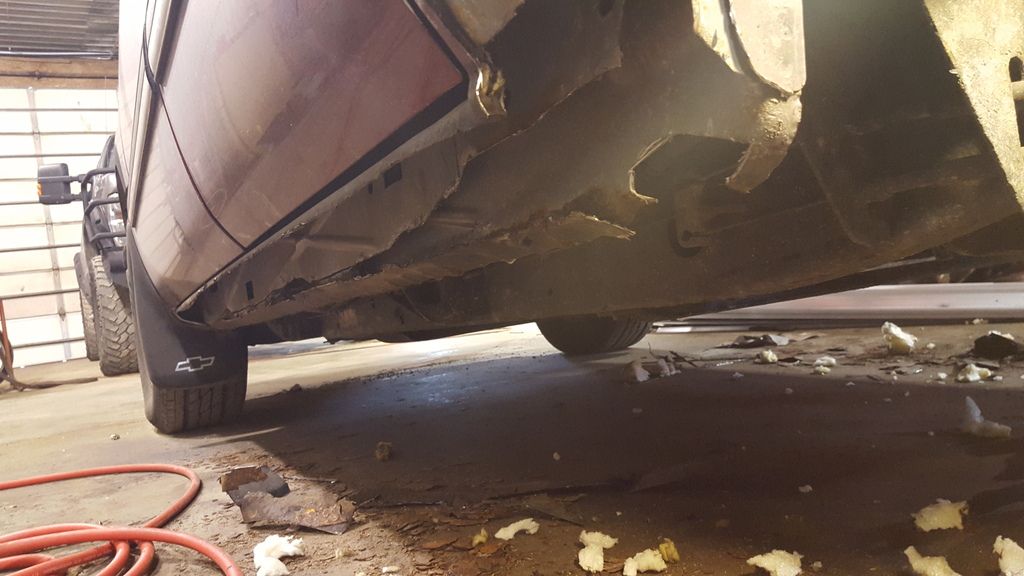
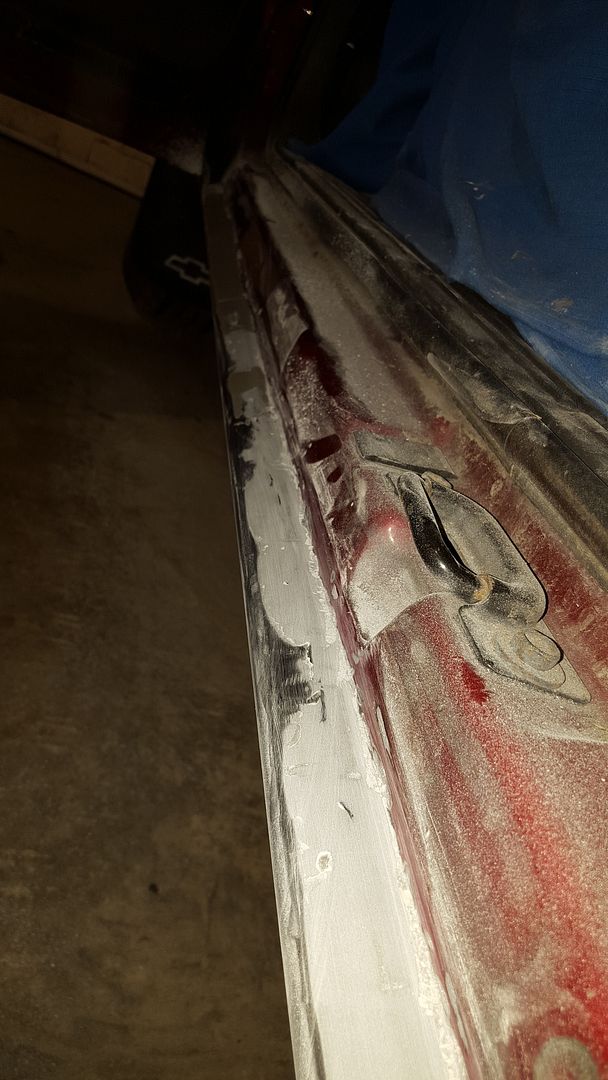
I may have gotten a tad overzealous with the cutoff wheel and grinder before actually taking pictures of the rotting rockers, so use your imagination, it was pretty bad. I was hoping that I could salvage most of the inner rocker panel, and managed to be able to, however, still had to cut upwards of an inch or two off of the bottom in places. Now the official way of removing the rockers would be to use the spot weld drill bit to drill out the welds and then an air chisel to separate the metal. Wasn't really an option here because the rust was so bad, and, well, I also didn't have the drill bit. So, at the point where the inner rocker makes the ninety degree bend inward mating with the back edge of the outer rocker, I made the cut, effectively turning the inner rocker into just a sheet of metal coming straight down. I trimmed out the rotted metal, cleaned up the surface rust, and then coated the interior with POR15.
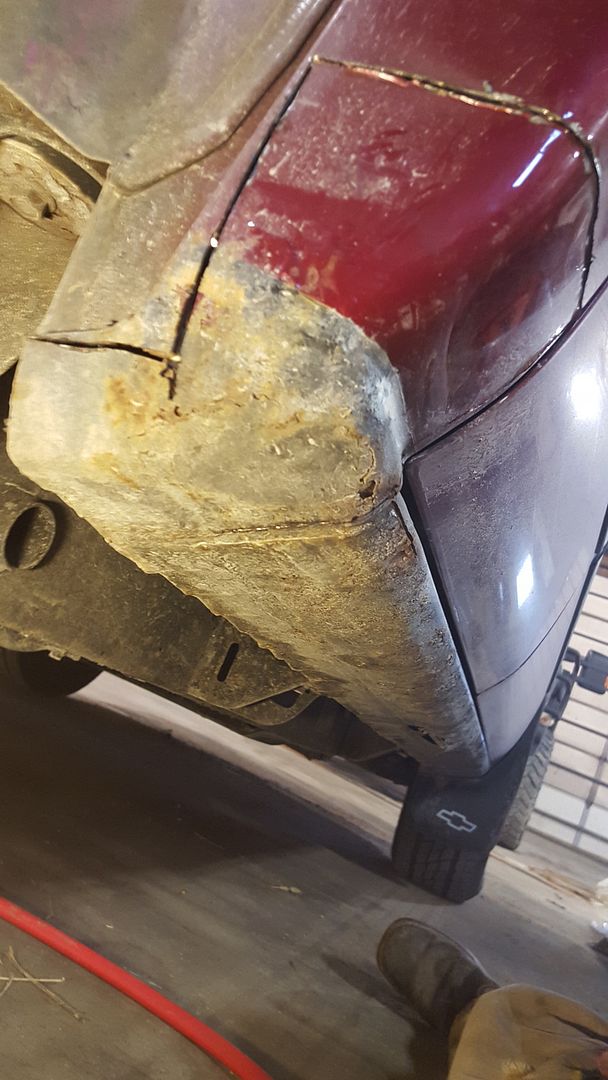
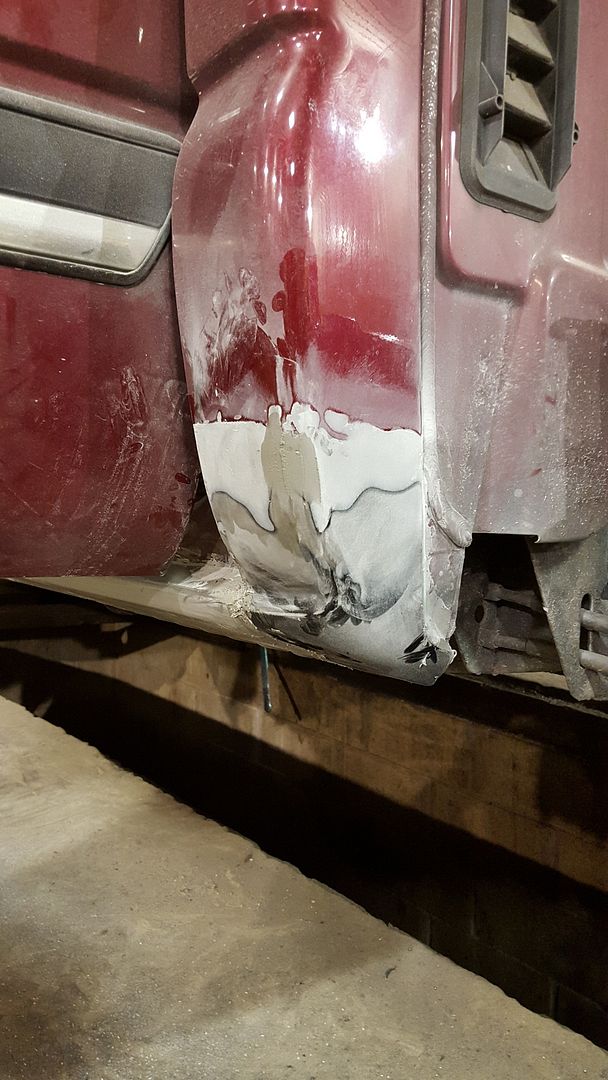
The cab corners were totally gone on the low end, and the paint was bubbling up to about four inched beyond the bottom edge of the door. So I cut it pretty high up with a nice level edge. It should be noted that typically work like this should be done with the rear doors removed, but after opening up and inspecting the interior and verifying no rust around the edge where the door would be in the way, I left the corner on. Also so that you know, GM put a form of insulation inside the actual cab corners which you need to remove as much as you can because it will catch fire when welding on the new panels if not. I personally believe the insulation to be part of the rust problem because I would think that it holds moisture and accelerates the issue. But, details. The foam is glued in and really hard to get out, just a forewarning.
After I cut everything off, I wire-brushed every surface, before coating every interior rocker surface with POR15 and laying up the replacement rockers and marking the placement of the upper edge. So the next discussion is the replacement. There are two ways to replace; you can either trim out entirely and butt the new metal up to the old, and weld in place, or you can overlap the new metal over the old and then weld on. I did tons of research and both have advantages and disadvantages and uses. Basically, butting up the metals is a better weld and more professional way of doing it, but for thin patch panels, overlapping is best. However, overlapping allows a space between that can hold impurities and again, start a rusting process. The rockers I bought are technically patch panels, meant to cover the existing areas, but I figured I would use them as a full outer rocker as they were very thick and the rust had moved pretty high up on the existing ones. So I cut the old rocker all the way up, and the new rocker to fit within, before welding on. Since there was a lack of a lip in the back of the inner rocker (had to cut it off) to weld the new outer sleeve to the inner rocker, I did some overkill welding to create a ninety degree joint to hold it all. Yes the rocker is angled in a few degrees less steep now because I had to take so much of the inner rocker off, but honestly, you can't tell, and because the rocker is for aesthetics and not load bearing, it shouldn't make a difference.
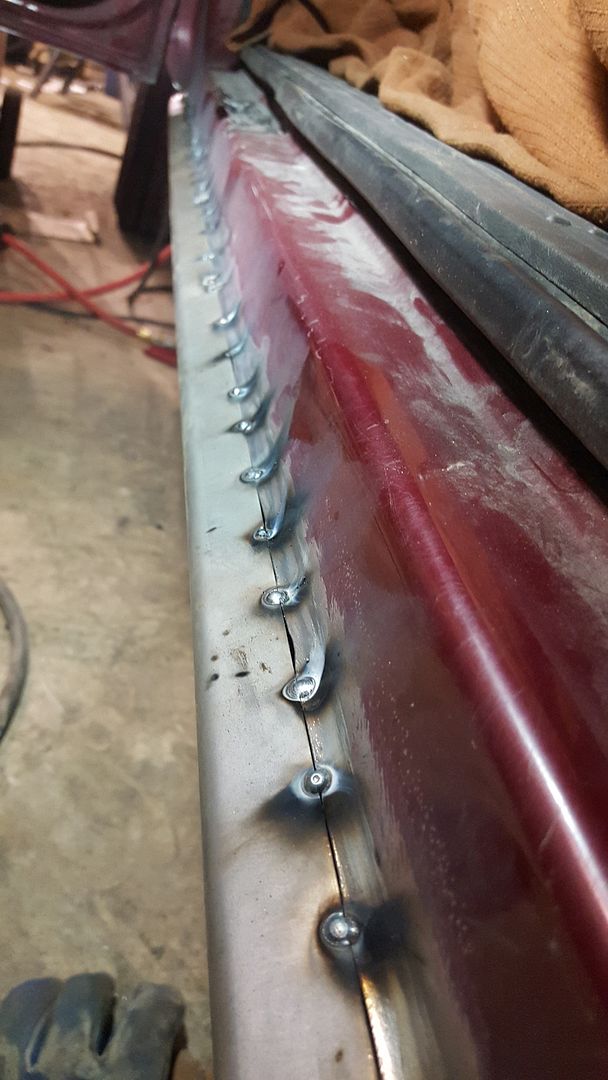
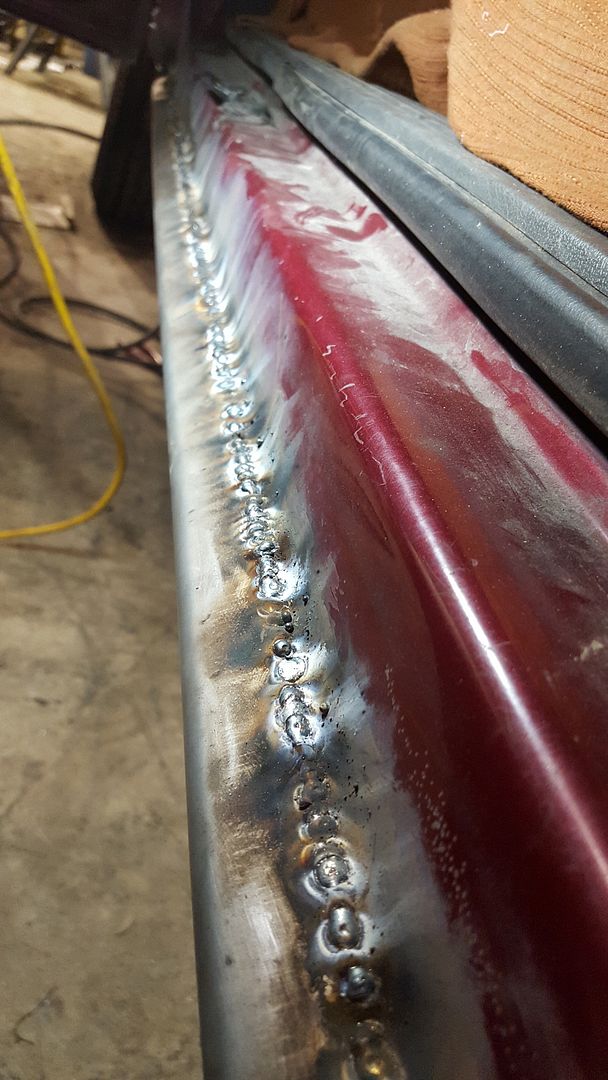
As far as welding the new panels on, you have to do a series of tac welds, and then repeat throughout the outer perimeter of the panel. You cant actually strike and hold an arc with the sheet metal because it is so thin. If you try to do it that way, you'll get burn throughs and warping of the thin sheet metal. So, tac it in, and then work around the panel connecting the tacs with more tacs, in a checkerboard pattern so you are never in the same place once welding, keeping the panel from heating up. And if the panel heats up, then air from the spray nozzle and compressor will counter it. Do your best to keep the panel cool to prevent warping, but don't use water. That can be detrimental to the welds. It should also be stated again that I am not a professional welder. Yes some of the welds look like crap I know, but they retain their strength. For each ugly looking weld, there are two good ones.
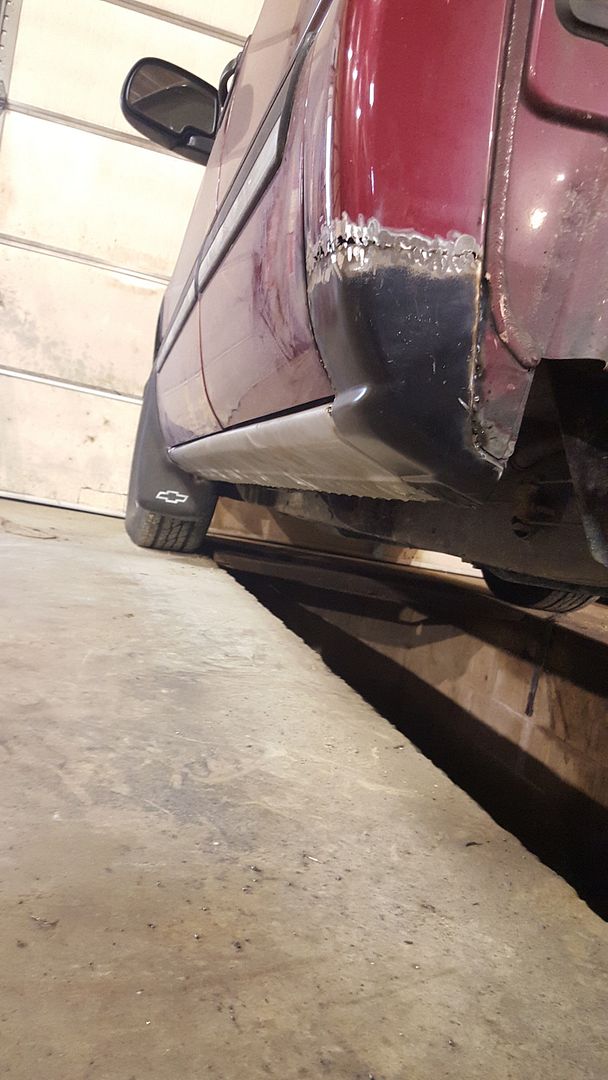
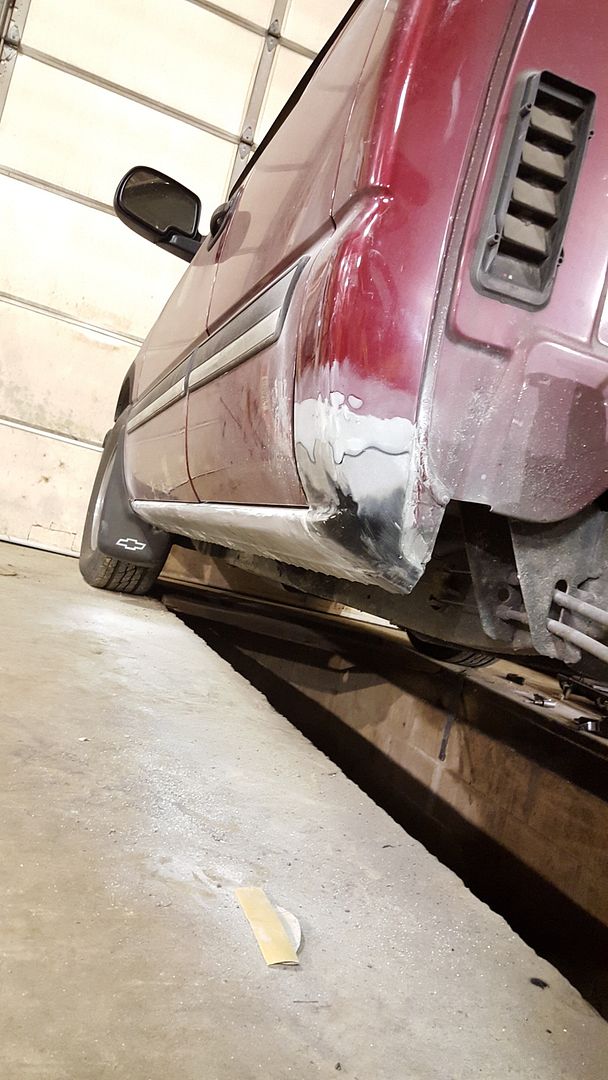
I then cut the cab corners to fit, and welded them in with the bottom overlapping the back of the new rocker put in. Again, if you don't remove the insulation within the upper cab corner, a fire will start, which happened to me numerous times, but a quick burst of air from the spray nozzle of the air compressor solved the problem each time.
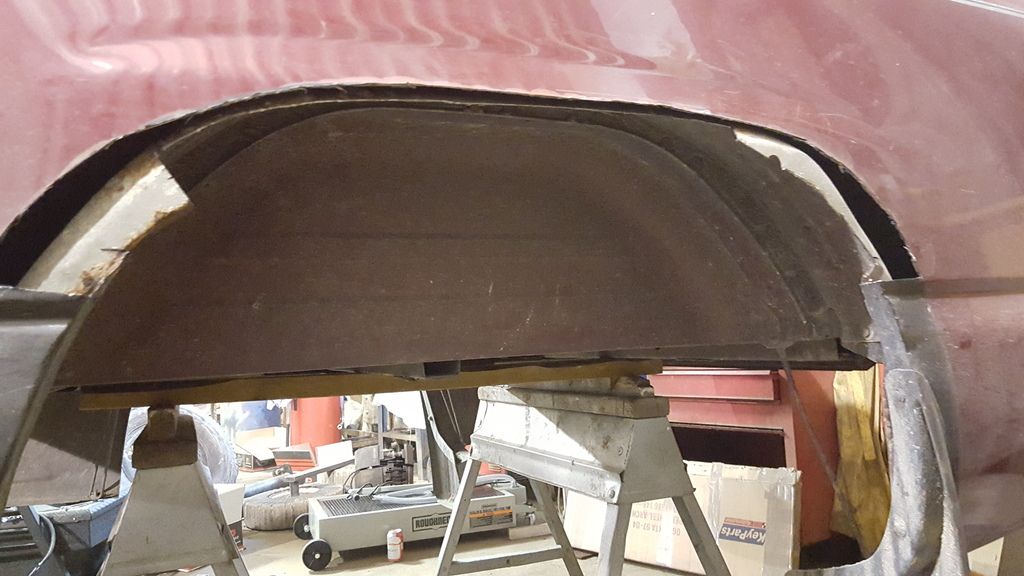
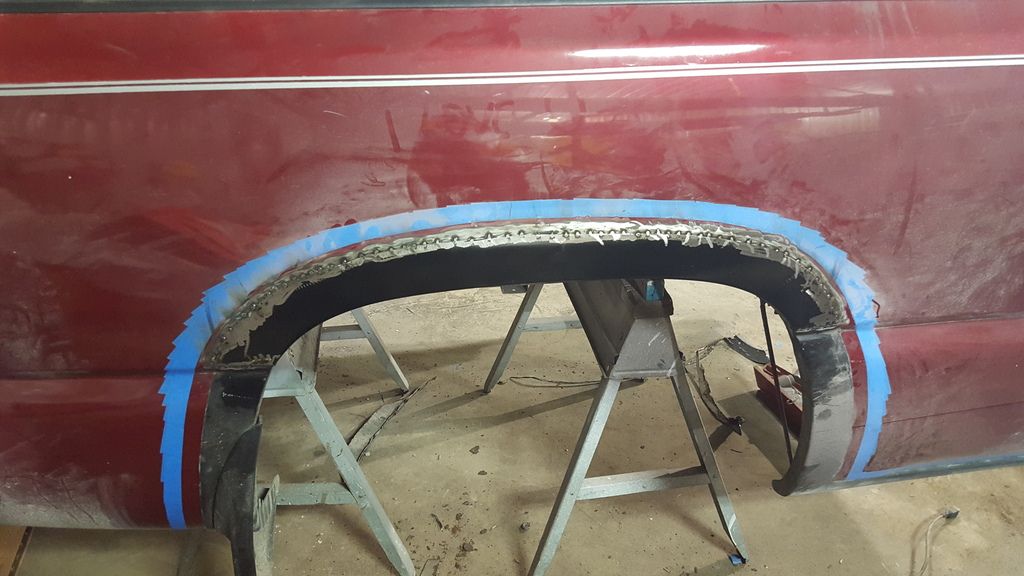
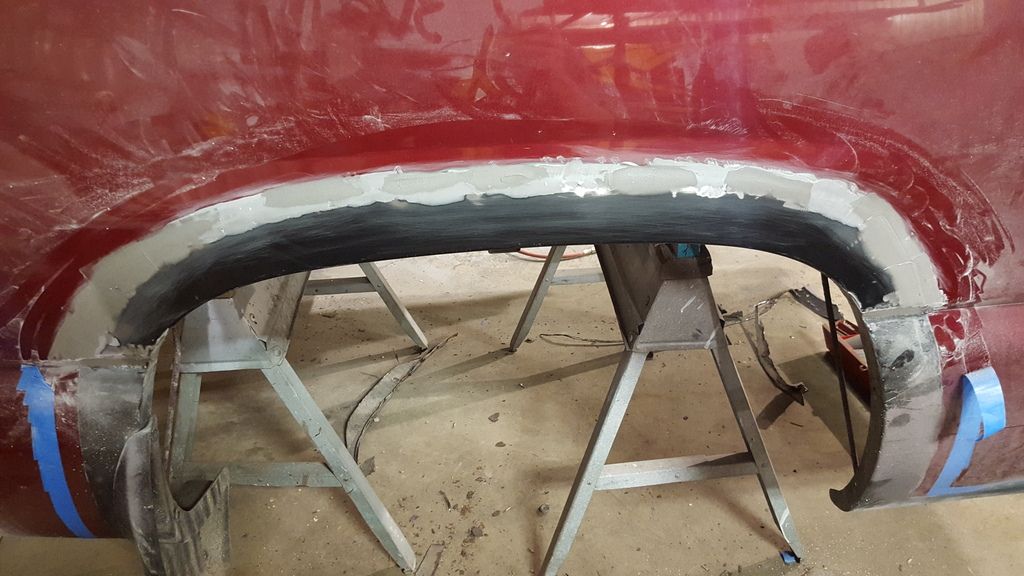
Lastly, the rear fenders were pretty bad, but not terrible. I took off about three inches all around, and then had to take off part of the inner wheel well too. As with the inner rocker, I took more than I wanted, but managed to salvage most, before coating the inside surfaces with POR15. The patch Panels I had for the fenders were relatively thin, and it was by far easier to overlap the metal by about a quarter of an inch as opposed to attempting the butt the metal up. Trying to cut a perfectly contoured groove on a curve so that the old panel butts up to the new perfectly with no gaps is very challenging. So I chose to overlap the panels, cut everything and cleaned up all the edges before placing the fenders and tac welding in place, and then a repeating of the welding process.
After grinding down the welds, some bondo and medium to high grit pads on a DA smooth out everything nicely. From there, just priming and sanding until everything was smooth.
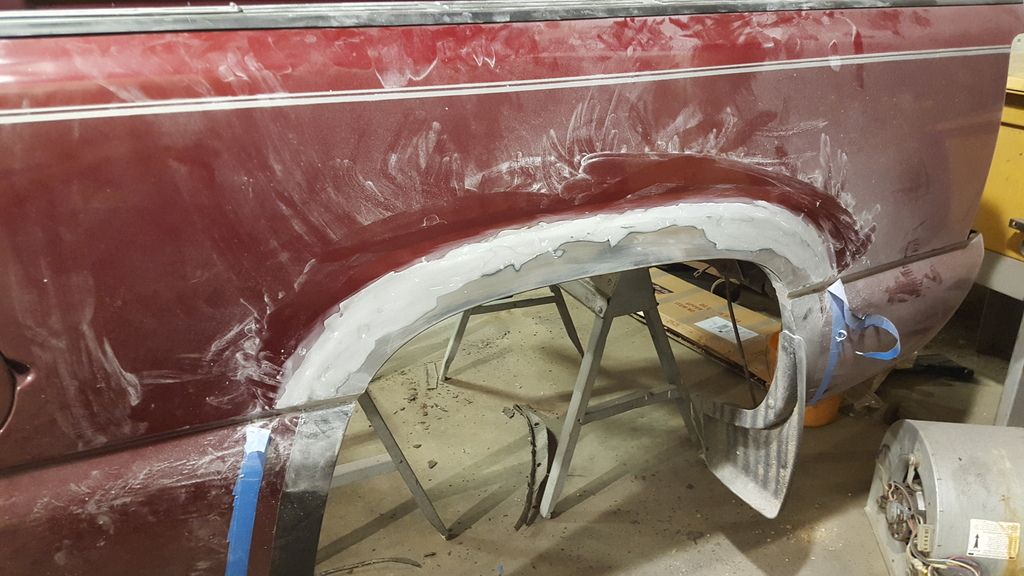
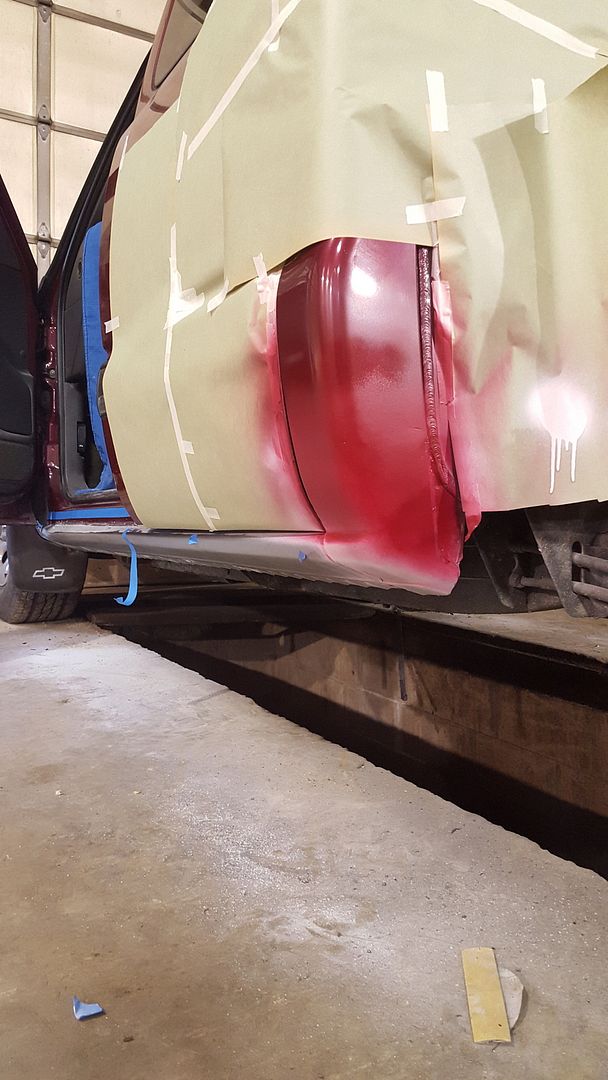
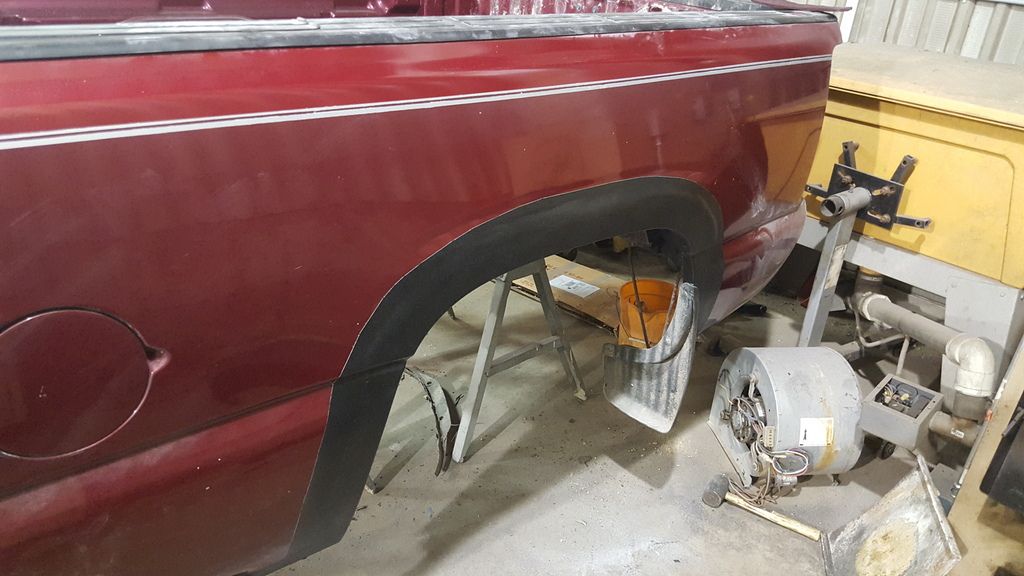
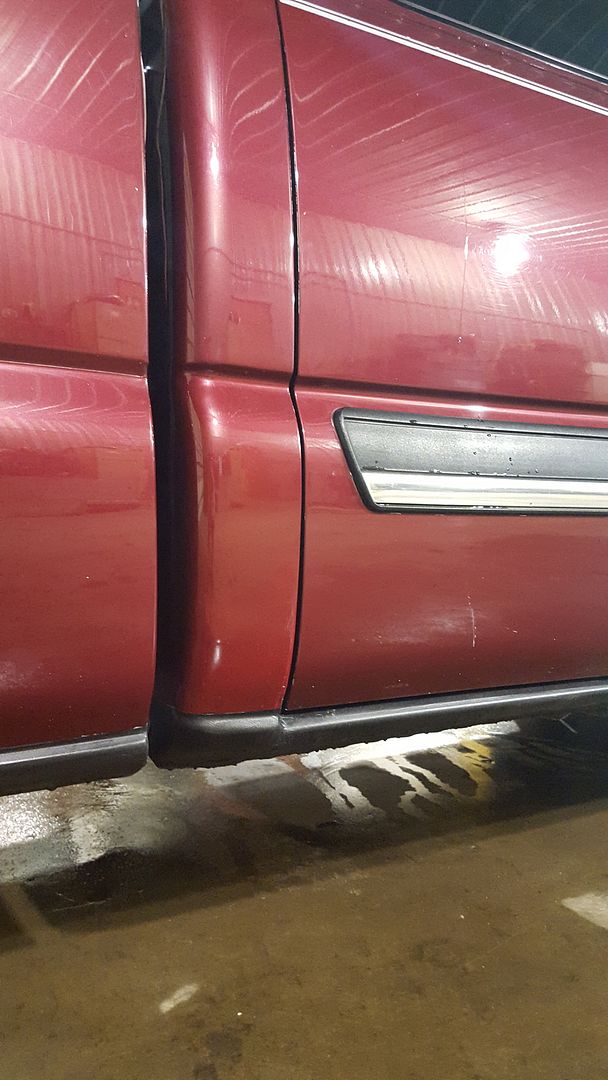
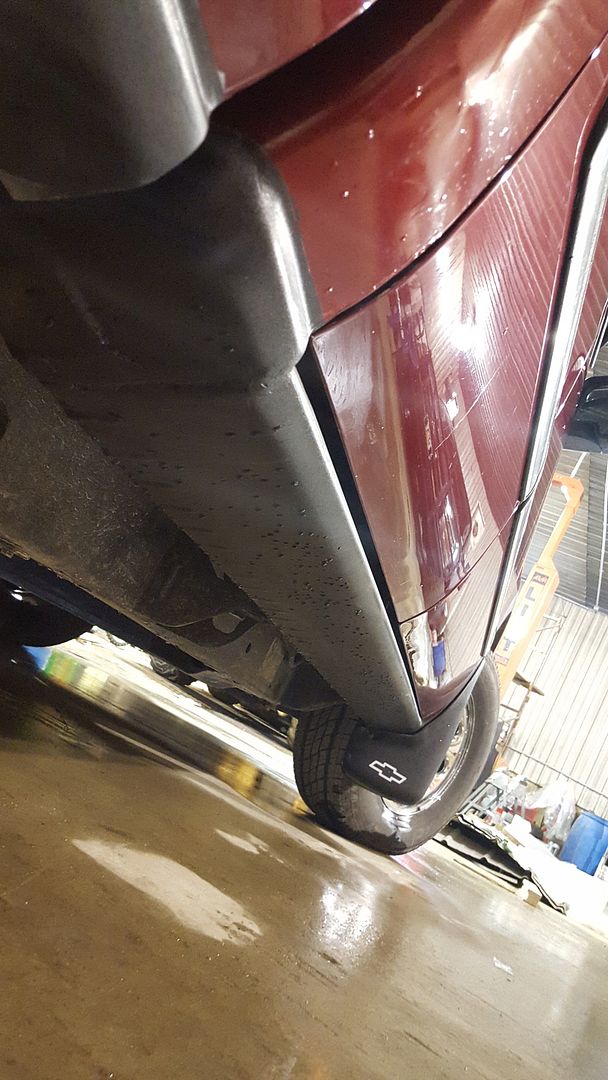
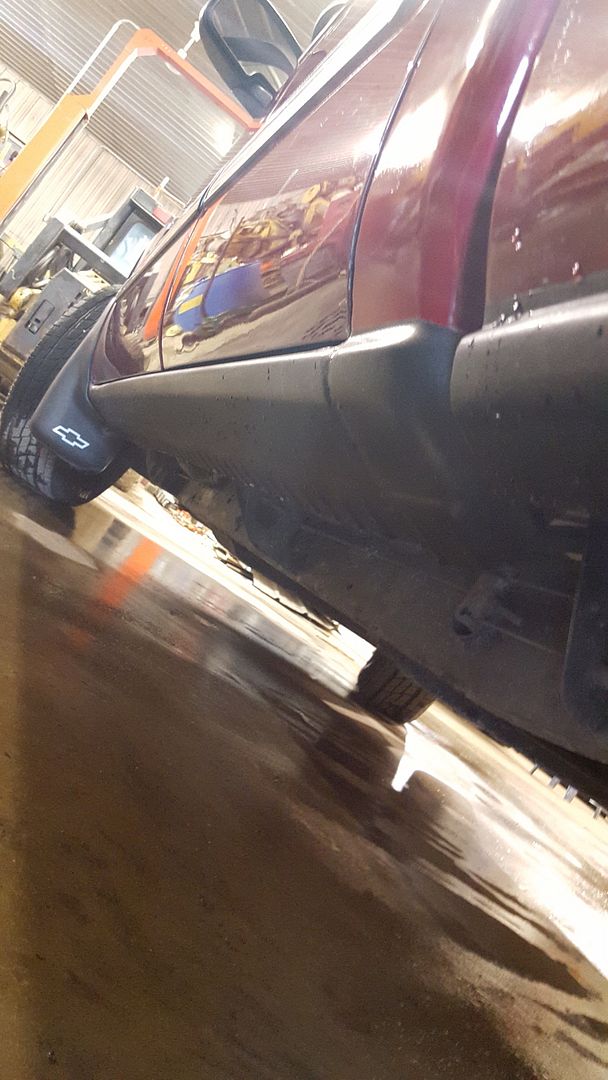
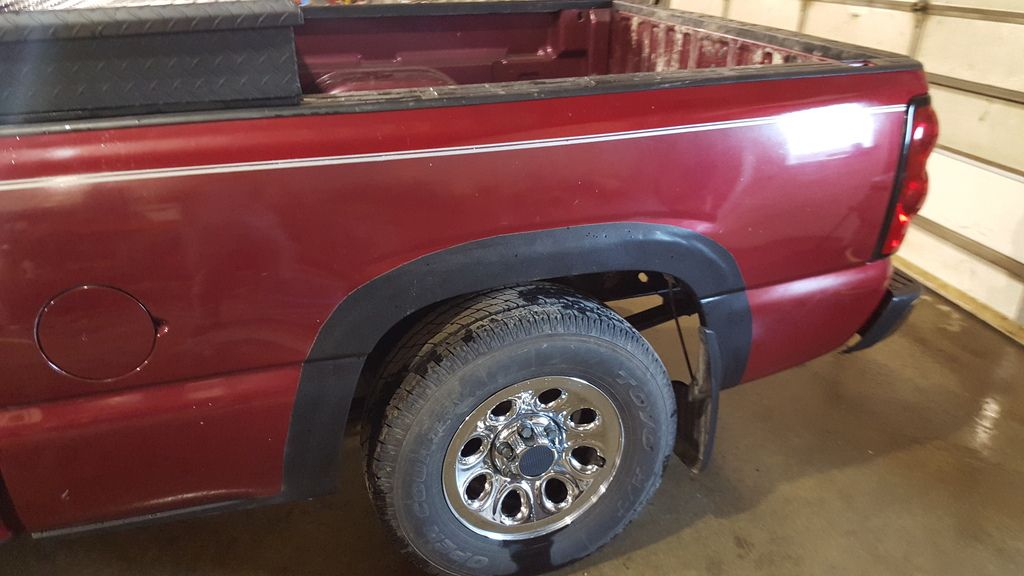
I finished the fenders off by simply widening the black bed-lined wheel arch. After priming the rockers, I again finished them off with the black bed liner for ease of upkeep. The cab corners needed color matched though. I taped off the section up to about 9 inches into the existing paint, before then priming the bondo and new metal, before applying the Sport Red paint. It took 12 very light coats, focusing on only the new part, with the last few coats stretching up to the tape to blend the paint into the old color. I applied four coats of clear coat before removing all the tape and blending in the clear coat in the same fashion. The finished product is below.
Lastly, I coated EVERYTHING in fluid film. For those of you who don't know it, I highly suggest. Farmers have used it forever for literally everything, and it does wonders at preventing rust. Its not like the permanent POR15 and needs re-sprayed every 6ish months, but its worth it. I sprayed an entire can of the stuff into both rocker panels and cab corners, soaking them internally and externally. I also hit the underside of the bed, and the inside of the wheel arches where the inner fender no longer existed.
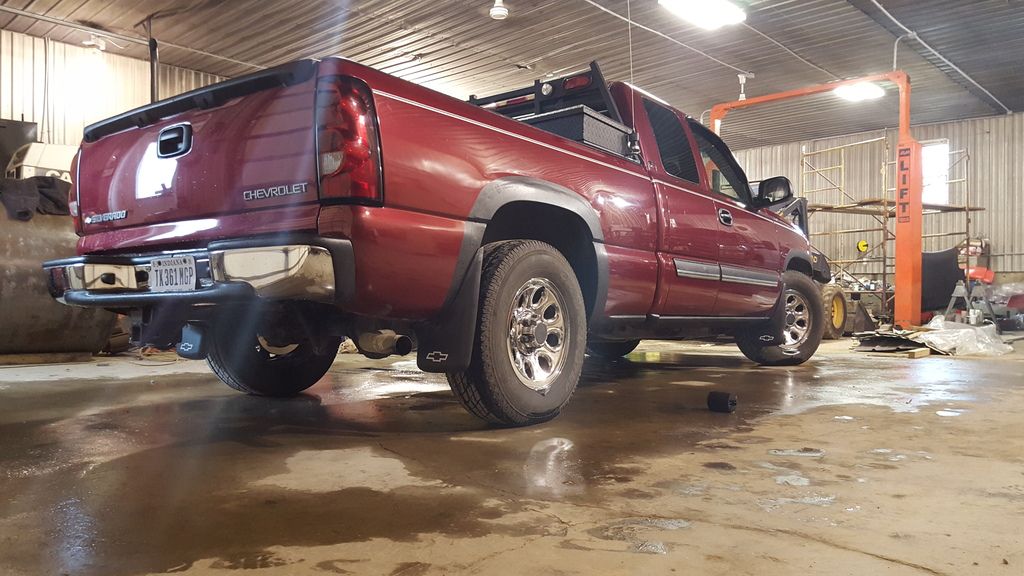
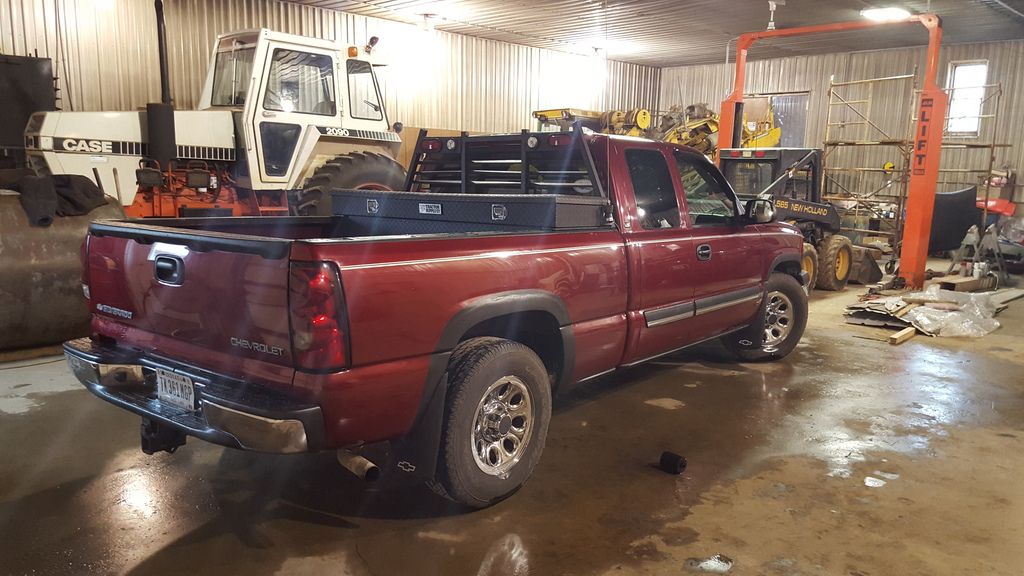
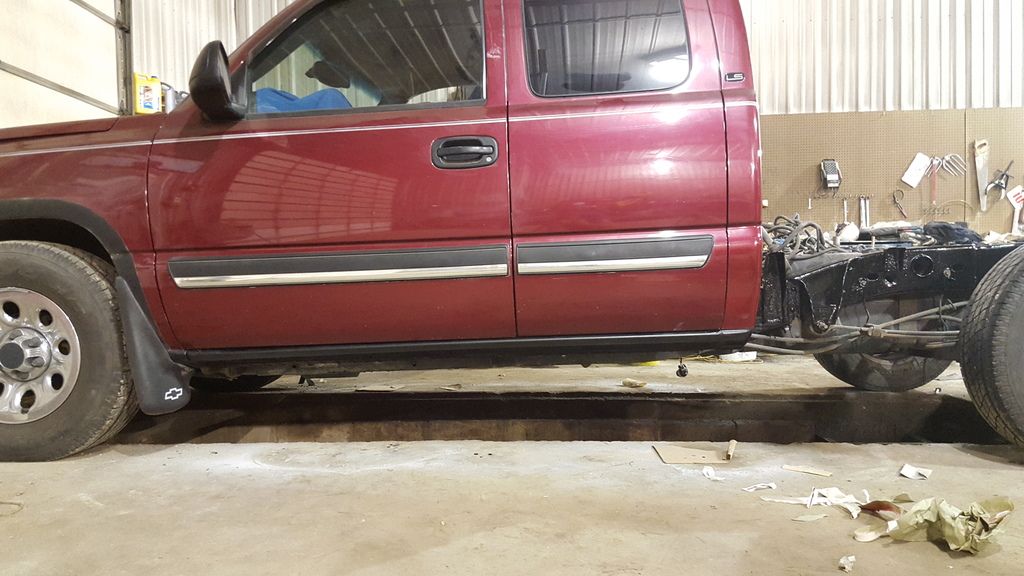
All in all, the finished product makes me happy. It looks infinitely better, will last for quite a while before I do a full rocker and corner replacement, and unlike what a shop will charge, it ran me $290 for the paneling, $100 for the paint (which I got enough of to paint and entire bed and therefore wont need to get more of for a long time) and roughly $100 for assorted chemicals and other expenditures, not including grinding and cutoff wheels nor the new shielding gas tank for the welder. If you know where to look, you can see an every so slight difference in hue of the pain as well as a ever so slight increase in the flare around the rear wheel arches, but if you don't know what you are looking for, you cant tell. Like I said, Im not pro, but I pride myself on doing my own things. If you have access to a good welder as well as the other tools, and have the desire, then give it a shot. You will learn a lot simply in just applying yourself and doing it, and you can take pride in the fact that you did it. If you have any questions, feel free to ask and discuss. I tried my best to keep this relatively short.
First and foremost, to work on the cab corners, you really need to remove the bed, which is easier than it seems. There are eight bolts that bolt it to the frame, and then two bolts and a push plug that hold the gas tank fill neck to the bed. Remove them all as well as the tail lights and the clips up under the bed that hold some of the wiring to the rear lights, and the bed lifts right off. Grab four people, and set up some saw horses with 2x4's to set it on and that parts done. Since the bed was off, I also took the opportunity to completely grind down and coat the back part of the frame in POR15 to prevent further frame rust. I swear by POR15 and advise it to anyone who asks me how to fix and prevent rust.

I may have gotten a tad overzealous with the cutoff wheel and grinder before actually taking pictures of the rotting rockers, so use your imagination, it was pretty bad. I was hoping that I could salvage most of the inner rocker panel, and managed to be able to, however, still had to cut upwards of an inch or two off of the bottom in places. Now the official way of removing the rockers would be to use the spot weld drill bit to drill out the welds and then an air chisel to separate the metal. Wasn't really an option here because the rust was so bad, and, well, I also didn't have the drill bit. So, at the point where the inner rocker makes the ninety degree bend inward mating with the back edge of the outer rocker, I made the cut, effectively turning the inner rocker into just a sheet of metal coming straight down. I trimmed out the rotted metal, cleaned up the surface rust, and then coated the interior with POR15.


The cab corners were totally gone on the low end, and the paint was bubbling up to about four inched beyond the bottom edge of the door. So I cut it pretty high up with a nice level edge. It should be noted that typically work like this should be done with the rear doors removed, but after opening up and inspecting the interior and verifying no rust around the edge where the door would be in the way, I left the corner on. Also so that you know, GM put a form of insulation inside the actual cab corners which you need to remove as much as you can because it will catch fire when welding on the new panels if not. I personally believe the insulation to be part of the rust problem because I would think that it holds moisture and accelerates the issue. But, details. The foam is glued in and really hard to get out, just a forewarning.
After I cut everything off, I wire-brushed every surface, before coating every interior rocker surface with POR15 and laying up the replacement rockers and marking the placement of the upper edge. So the next discussion is the replacement. There are two ways to replace; you can either trim out entirely and butt the new metal up to the old, and weld in place, or you can overlap the new metal over the old and then weld on. I did tons of research and both have advantages and disadvantages and uses. Basically, butting up the metals is a better weld and more professional way of doing it, but for thin patch panels, overlapping is best. However, overlapping allows a space between that can hold impurities and again, start a rusting process. The rockers I bought are technically patch panels, meant to cover the existing areas, but I figured I would use them as a full outer rocker as they were very thick and the rust had moved pretty high up on the existing ones. So I cut the old rocker all the way up, and the new rocker to fit within, before welding on. Since there was a lack of a lip in the back of the inner rocker (had to cut it off) to weld the new outer sleeve to the inner rocker, I did some overkill welding to create a ninety degree joint to hold it all. Yes the rocker is angled in a few degrees less steep now because I had to take so much of the inner rocker off, but honestly, you can't tell, and because the rocker is for aesthetics and not load bearing, it shouldn't make a difference.
As far as welding the new panels on, you have to do a series of tac welds, and then repeat throughout the outer perimeter of the panel. You cant actually strike and hold an arc with the sheet metal because it is so thin. If you try to do it that way, you'll get burn throughs and warping of the thin sheet metal. So, tac it in, and then work around the panel connecting the tacs with more tacs, in a checkerboard pattern so you are never in the same place once welding, keeping the panel from heating up. And if the panel heats up, then air from the spray nozzle and compressor will counter it. Do your best to keep the panel cool to prevent warping, but don't use water. That can be detrimental to the welds. It should also be stated again that I am not a professional welder. Yes some of the welds look like crap I know, but they retain their strength. For each ugly looking weld, there are two good ones.


I then cut the cab corners to fit, and welded them in with the bottom overlapping the back of the new rocker put in. Again, if you don't remove the insulation within the upper cab corner, a fire will start, which happened to me numerous times, but a quick burst of air from the spray nozzle of the air compressor solved the problem each time.

Lastly, the rear fenders were pretty bad, but not terrible. I took off about three inches all around, and then had to take off part of the inner wheel well too. As with the inner rocker, I took more than I wanted, but managed to salvage most, before coating the inside surfaces with POR15. The patch Panels I had for the fenders were relatively thin, and it was by far easier to overlap the metal by about a quarter of an inch as opposed to attempting the butt the metal up. Trying to cut a perfectly contoured groove on a curve so that the old panel butts up to the new perfectly with no gaps is very challenging. So I chose to overlap the panels, cut everything and cleaned up all the edges before placing the fenders and tac welding in place, and then a repeating of the welding process.


After grinding down the welds, some bondo and medium to high grit pads on a DA smooth out everything nicely. From there, just priming and sanding until everything was smooth.


I finished the fenders off by simply widening the black bed-lined wheel arch. After priming the rockers, I again finished them off with the black bed liner for ease of upkeep. The cab corners needed color matched though. I taped off the section up to about 9 inches into the existing paint, before then priming the bondo and new metal, before applying the Sport Red paint. It took 12 very light coats, focusing on only the new part, with the last few coats stretching up to the tape to blend the paint into the old color. I applied four coats of clear coat before removing all the tape and blending in the clear coat in the same fashion. The finished product is below.


Lastly, I coated EVERYTHING in fluid film. For those of you who don't know it, I highly suggest. Farmers have used it forever for literally everything, and it does wonders at preventing rust. Its not like the permanent POR15 and needs re-sprayed every 6ish months, but its worth it. I sprayed an entire can of the stuff into both rocker panels and cab corners, soaking them internally and externally. I also hit the underside of the bed, and the inside of the wheel arches where the inner fender no longer existed.


All in all, the finished product makes me happy. It looks infinitely better, will last for quite a while before I do a full rocker and corner replacement, and unlike what a shop will charge, it ran me $290 for the paneling, $100 for the paint (which I got enough of to paint and entire bed and therefore wont need to get more of for a long time) and roughly $100 for assorted chemicals and other expenditures, not including grinding and cutoff wheels nor the new shielding gas tank for the welder. If you know where to look, you can see an every so slight difference in hue of the pain as well as a ever so slight increase in the flare around the rear wheel arches, but if you don't know what you are looking for, you cant tell. Like I said, Im not pro, but I pride myself on doing my own things. If you have access to a good welder as well as the other tools, and have the desire, then give it a shot. You will learn a lot simply in just applying yourself and doing it, and you can take pride in the fact that you did it. If you have any questions, feel free to ask and discuss. I tried my best to keep this relatively short.


