In this thread I will demonstrate how to properly install the RX catch can system on any 2014 and newer truck with the 5.3. The 6.2 is almost the same besides the one connection location.
Tools needed:
-15mm deep socket and ratchet, a 6" extension helps, a wrench will also work
-7/16 wrench and socket for catch can mount.
-8mm socket and ratchet for the intake clamps (flathead will also work, but I prefer the socket)
- 7/16 drill bit and drill
-1/4" NPT tap (depends on intake tube, will mention later)
- tubing cutter or other sharp blade to cut tubing.
Time involved: about 45 minutes depending on skill level and where mount the can
Steps:
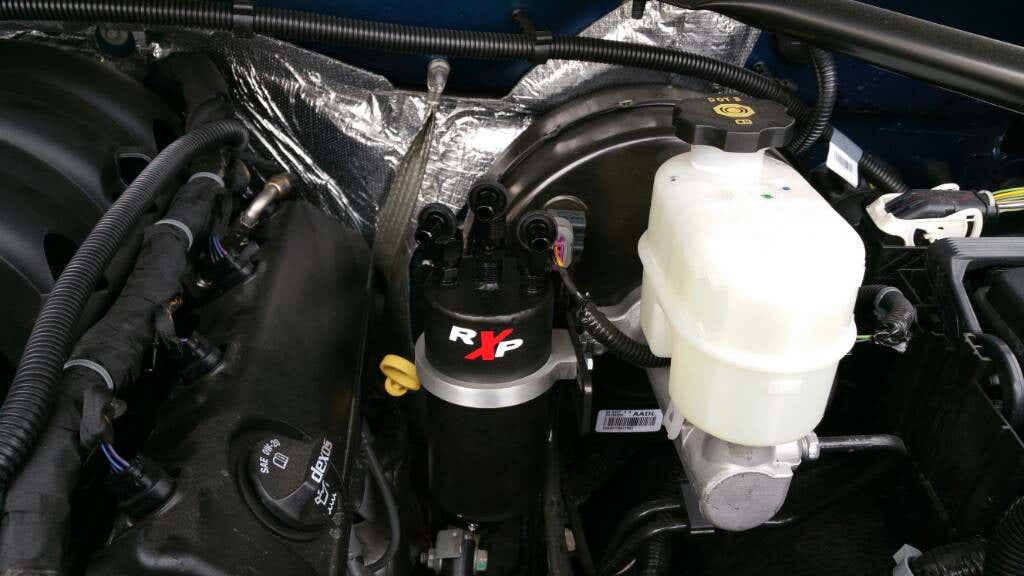
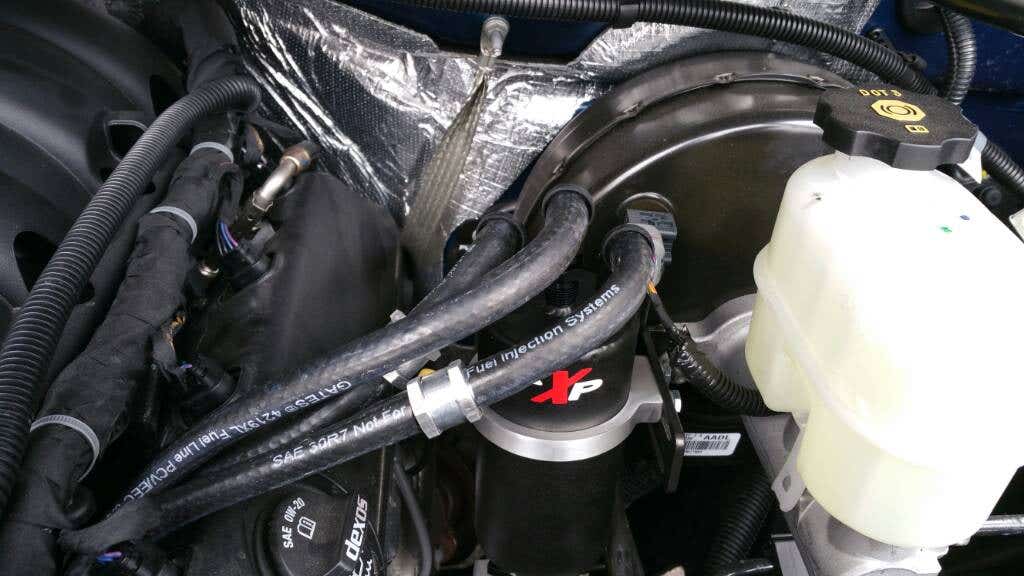
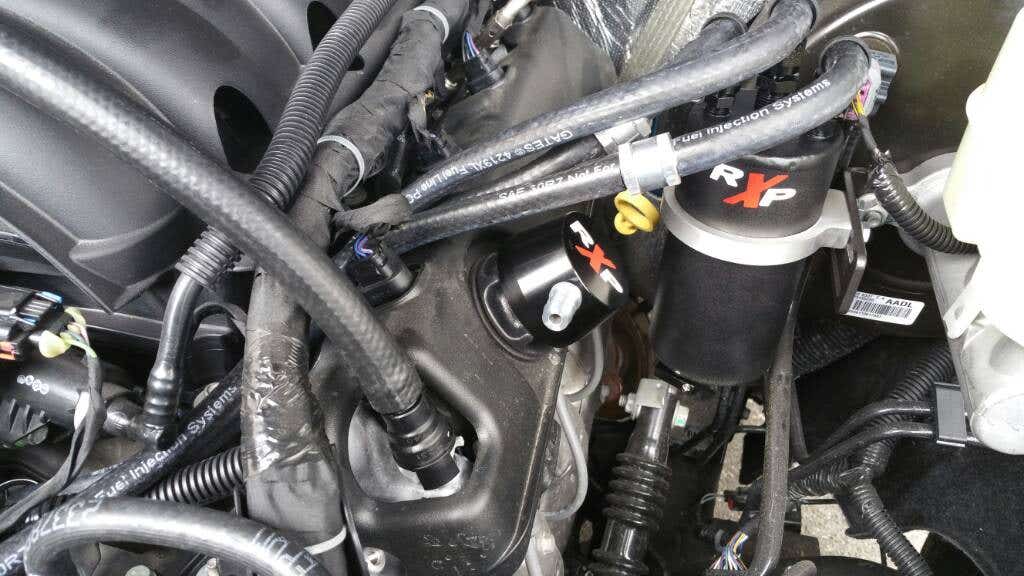
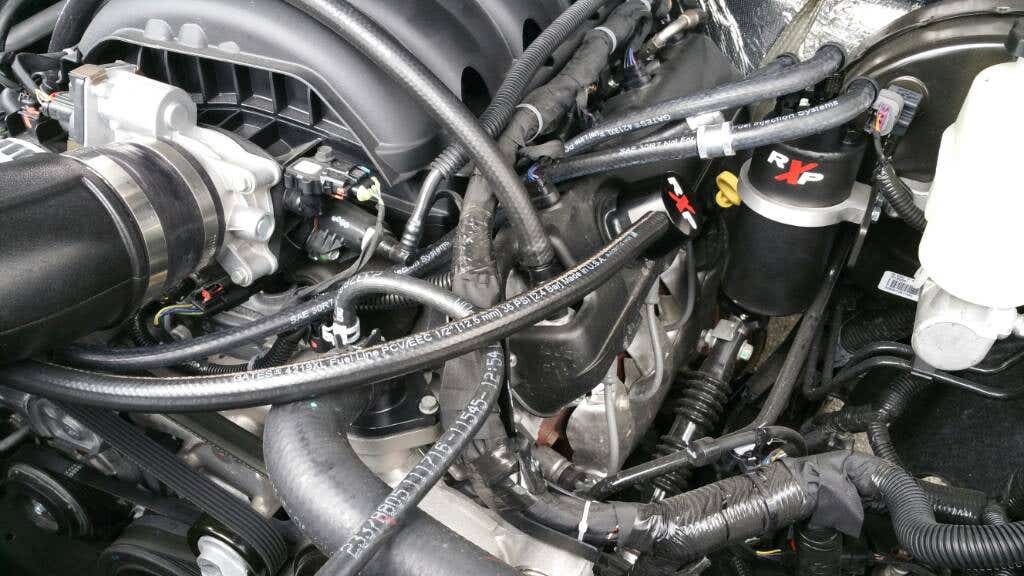
Step 1- decide where you want to mount your catch can. Keep in mind that you will have 3 lines going to it, and will want space underneath to drain it. I chose the common place of the brake master cylinder stud. So I chose the correct bracket that RX gives you and mount the can to the bracket and then the bracket to the stud. This is held on with a 15mm nut. There was blue thread lock on the stud from the factory so I cleaned and really applied some more when I put it back on.
![Image]()
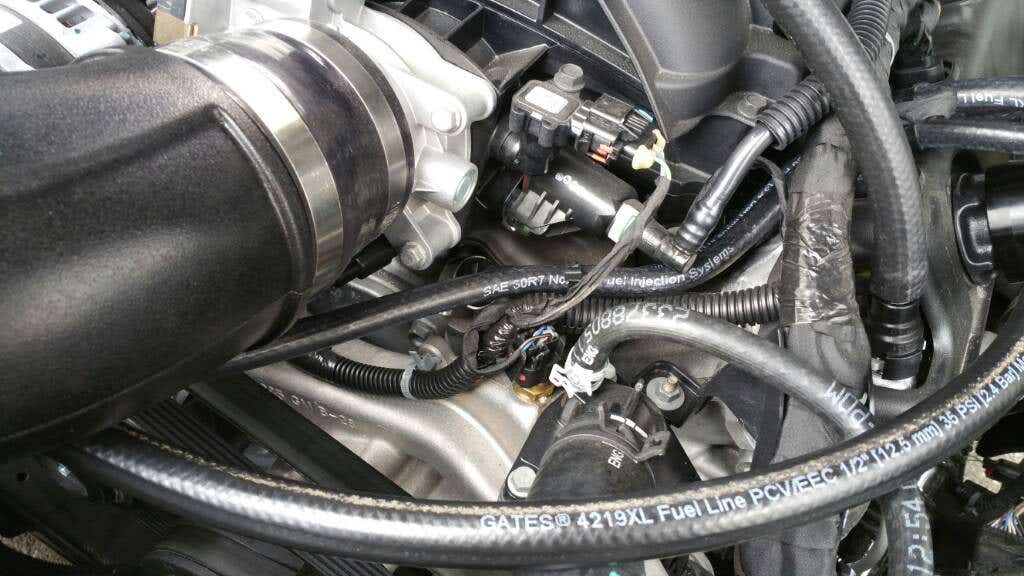
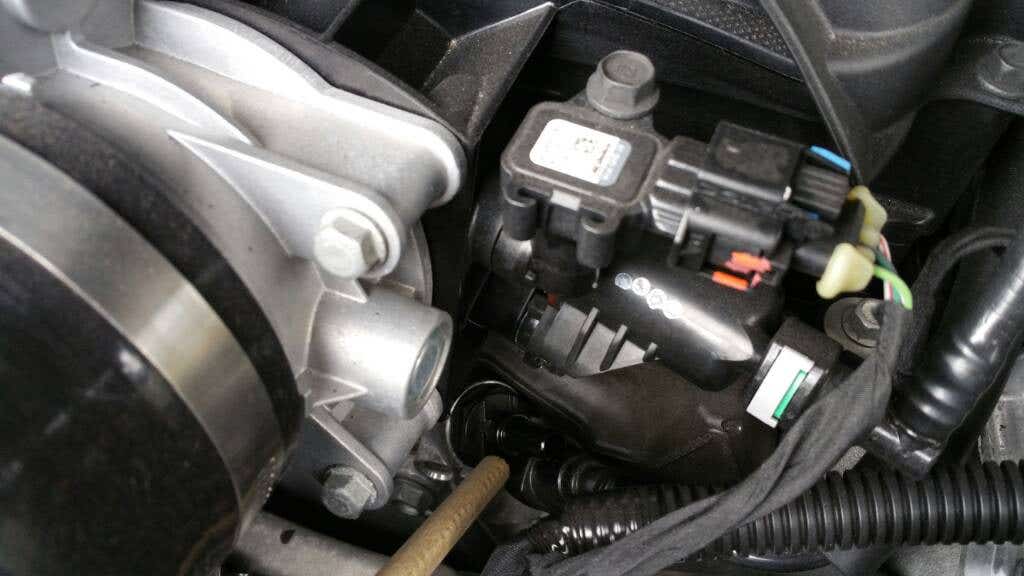
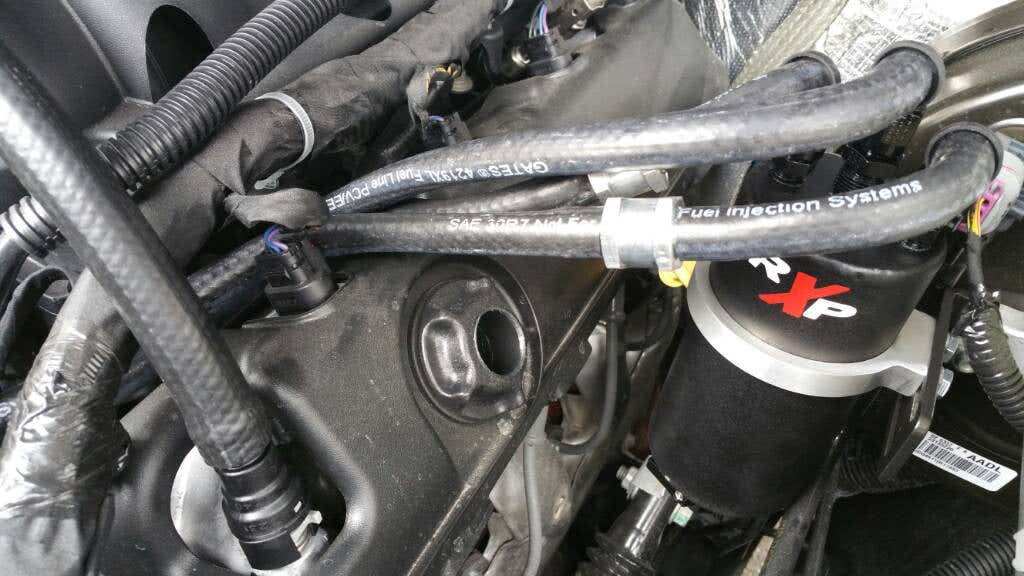
Step 2- remove the factory pcv line. You will want to remove the line that goes from the front of the motor, which is under the throttle body and slightly to the right (as viewed from the front). This is a push to disconnect so just push the grey tab and pull the line off.
![Image]()
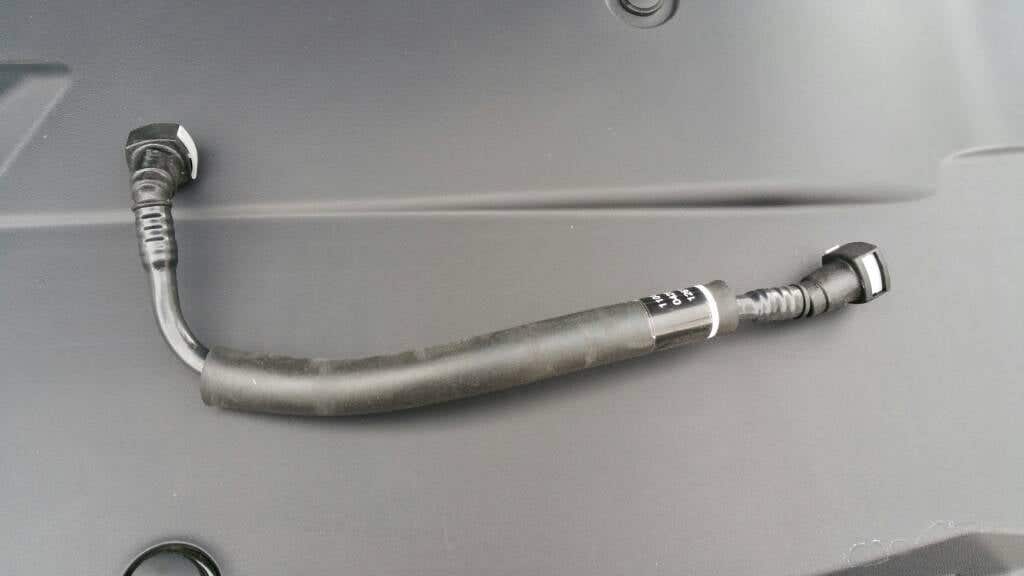
then twist the line slightly so the release tab faces out on the intake side of the line. Be careful here because the fitting on the intake is plastic and if it breaks, I think you need a whole new intake. So carefully disconnect the line and then remove it and set it aside.
![Image]()
![Image]()
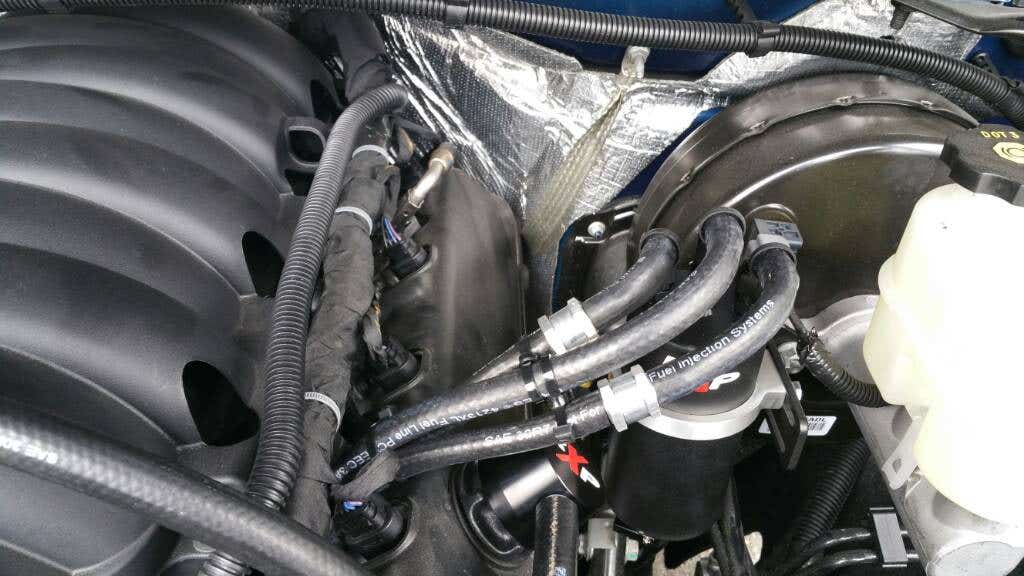
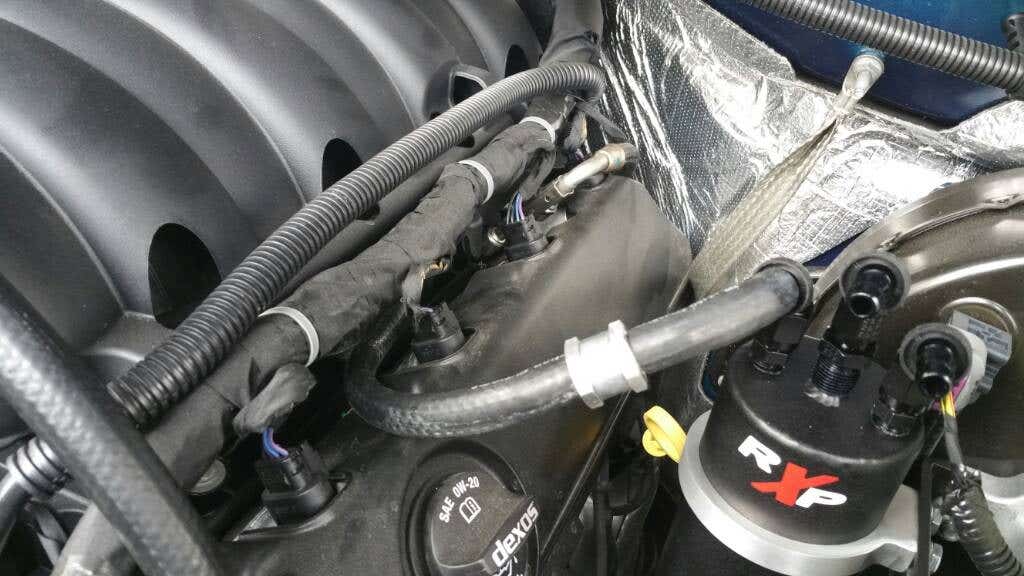
Step 3- Install primary evacuation line. This is your main discharge line of clean air from the catch can. You will pick one of the outer fittings on the can. I chose the closest one. Then, cut and install a short section of hose onto the can and put one of the included check valves, with the arrow facing the motor, inline with the hose then run the remaining distance the the fitting on the intake. Again, be careful pushing the hose on as this is just plastic.
![Image]()
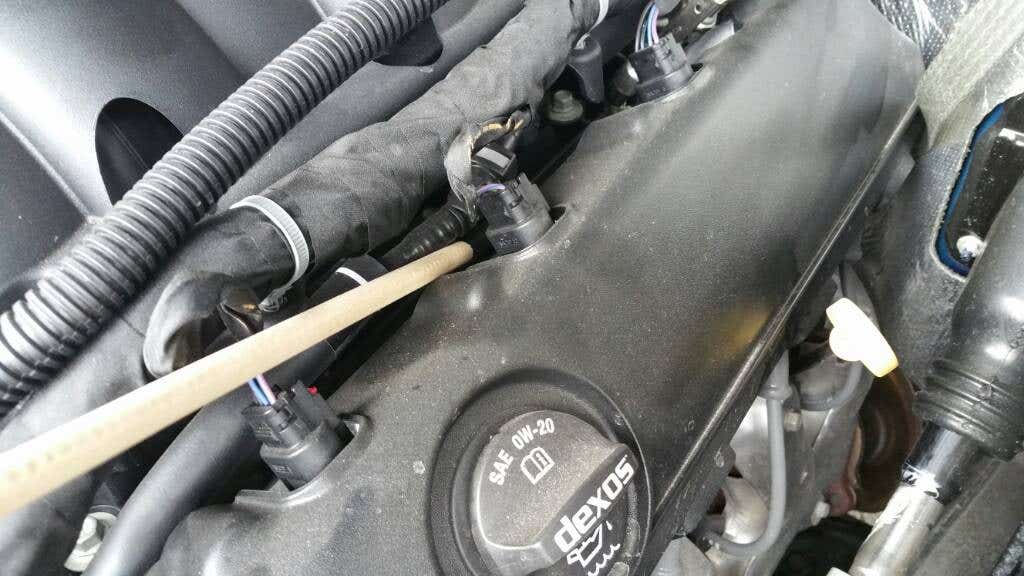
Step 4- Install "dirty" or can inlet line. This is your pcv discharge line. It is the one you removed under the throttle body. Route the hose in the cleanest way you can. I ran mine in the same location as the stock hose was. This goes to the center fitting on the catch can. Do not use a check valve on this hose.
![Image]()
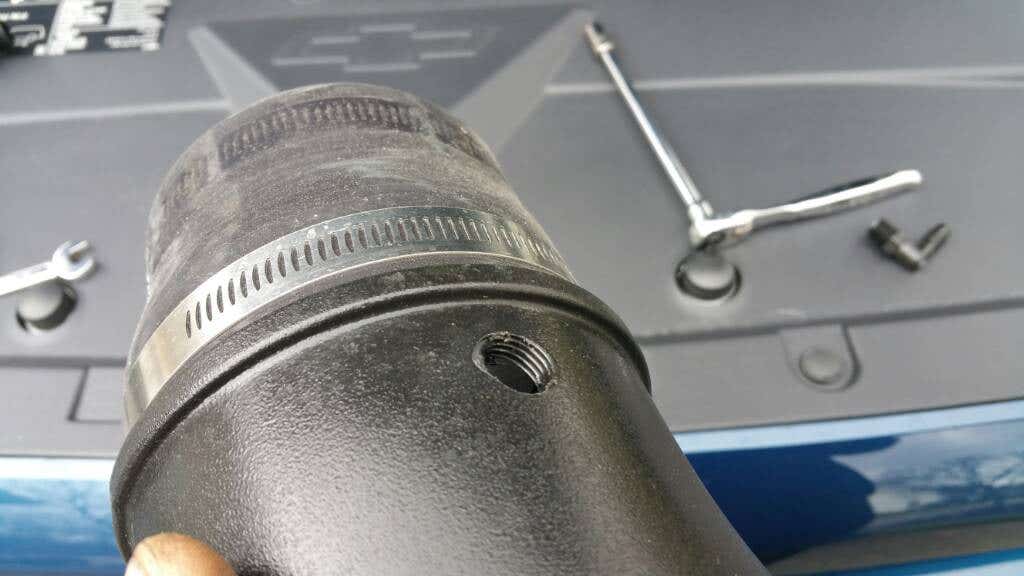
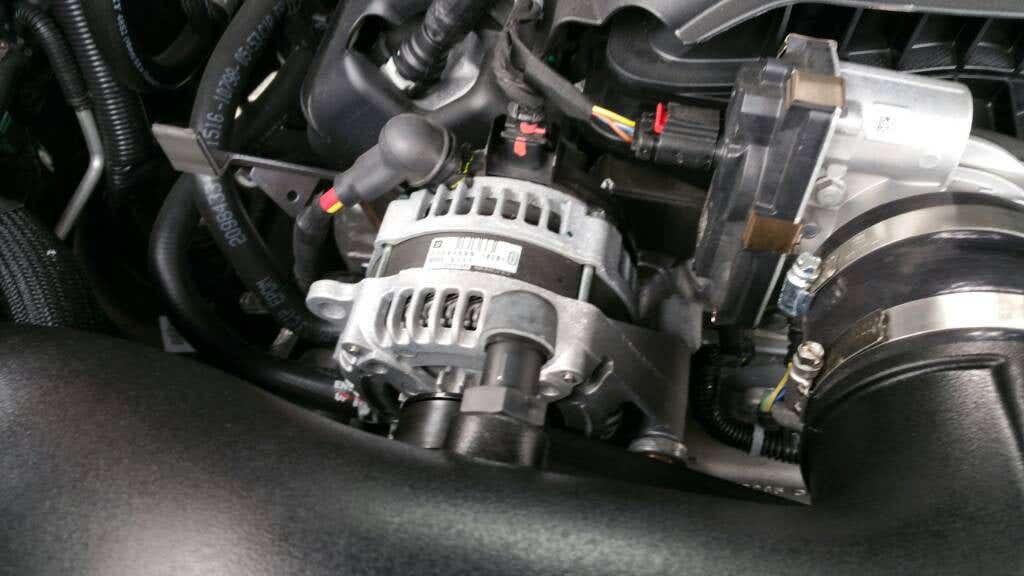
Step 5- Remove intake tube and drill/tap hole for secondary outlet. This is where the install will vary depending on which intake you have. I have the airaid MIT, so this will be the same for most other aftermarket tubes. The stock tube is similar. The idea here is to put the fitting as close to the throttle body as possible. I put mine underneath and used one of the included 90 degree fittings. Once you decide where you want the fitting, make sure it won't interfere with the belt or other lines. Then drill the hold using a 7/16 drill bit. Now tap the hole using the 1/4" NPT tap. I used some Teflon tape on the threads of the fitting for some extra assurance.
![Image]()
![Image]()
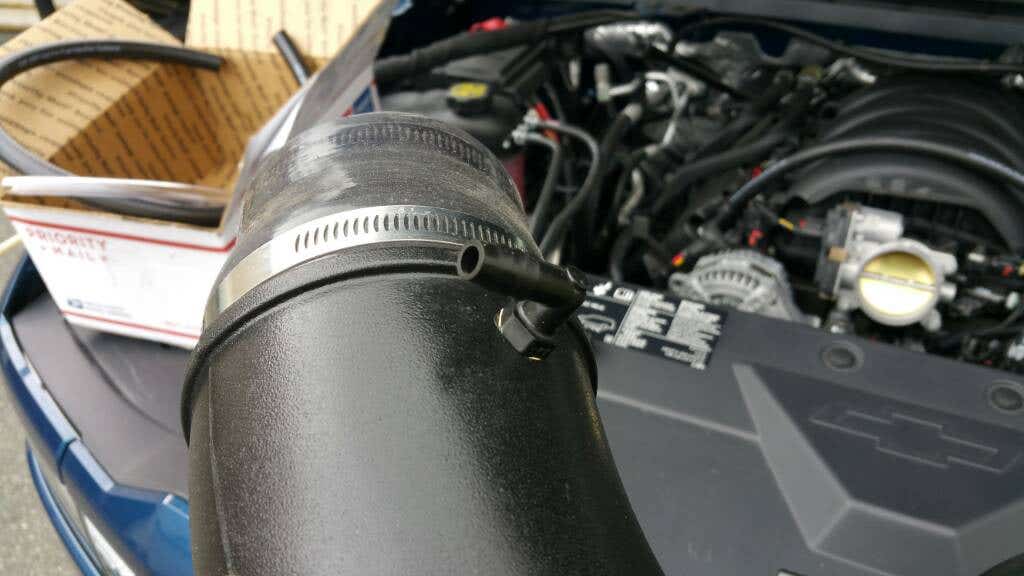
orient the fitting to face in the direction of your can. Then install the tube back on the truck.
Step 6- install secondary outlet hose. This is easy. Just run the hose from the new fitting you put in, to the last fitting on the catch can. Install the other included check valve inline with the arrow facing the intake tube.
![Image]()
At this point you are done with the catch an install. You can clean up the loose hoses with some zip ties then start the truck to make sure you haven't made any leaks. If you bought the clean side separator, keep reading.
Clean side separator install.
Step 1- remove both valve cover breather tubes. These are on the front of ceach valve cover and are the same push to release fittings as before. They run to your intake tube.
Step 2- install the included pre-made valve cover bridge hose. Simply push each fitting onto the valve covers
![Image]()
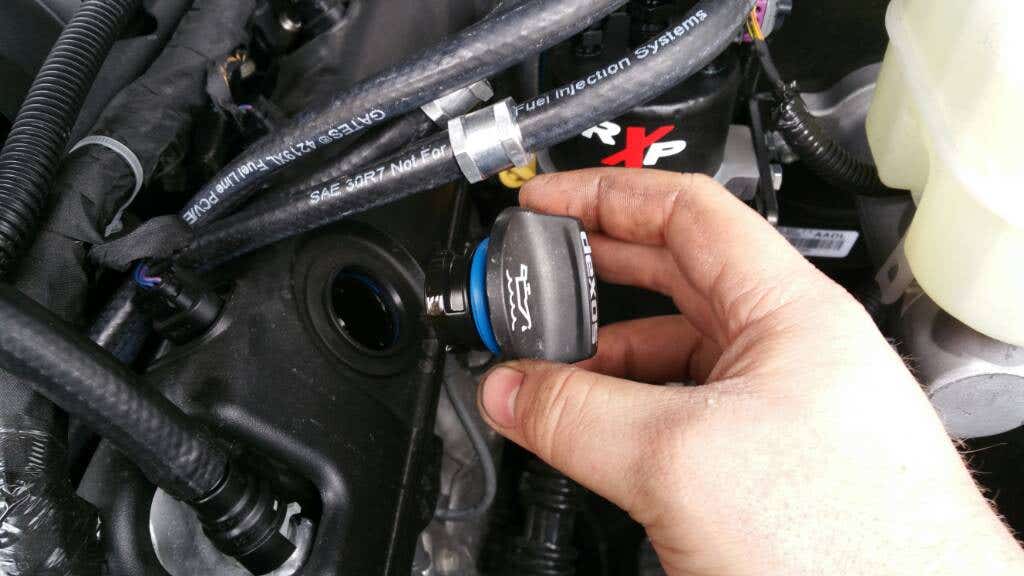
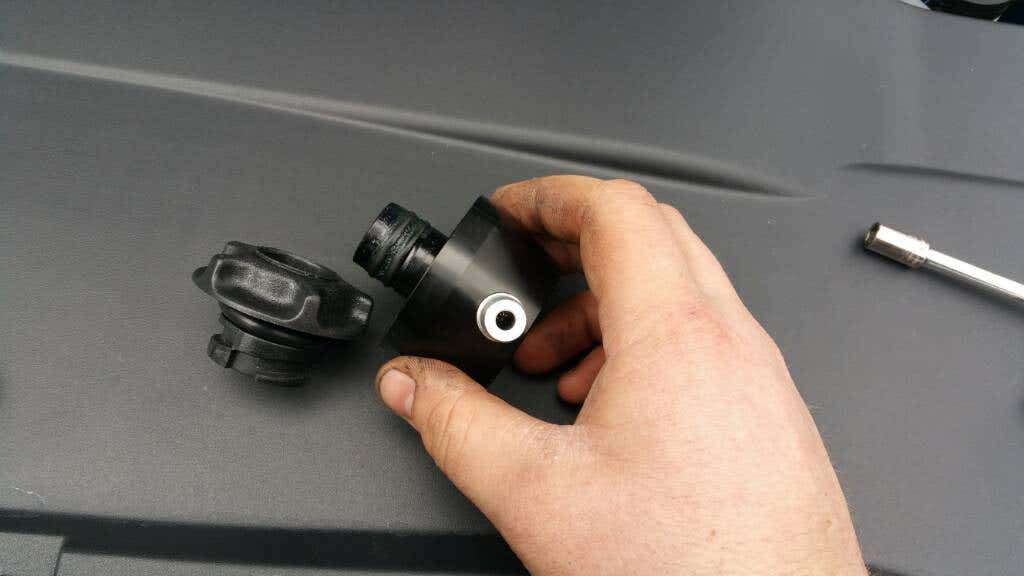
Step 3- remove stock oil cap. Set the stock oil cap aside and install the included cap with the hole in the center.
![Image]()
![Image]()
![Image]()
now push the clean side sperator into the new oil cap. Face the barb forward.
![Image]()
Step 4- install the included hose onto the closest fitting on the intake tube. In my case this was the lower fitting on my intake tube. Then run the hose to the clean side sperator and trim to length and push it onto the barb.
![Image]()
Step 5- install the included vacuum cap on the unused fitting on the intake tube. Just a note here, the included cap is really made for the stock intake, so it is a little small for the airaid tube. I will be getting a threaded plug since that will be a cleaner look anyway.
![Image]()
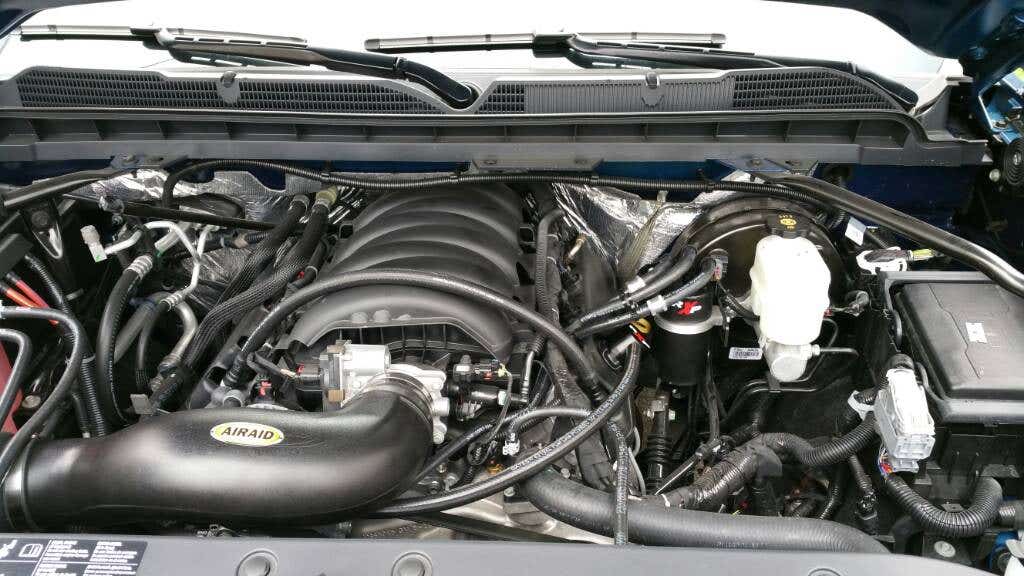
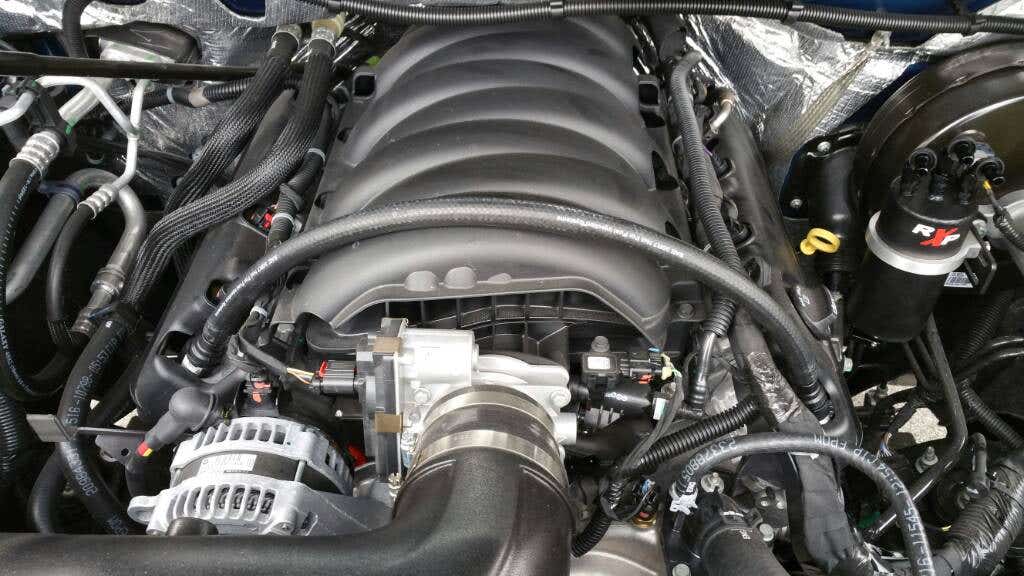
Final step for the project- clean up any loose hoses with zip ties and check for any potential clearance issues with any moving parts.
![Image]()
![Image]()
![Image]()
Tools needed:
-15mm deep socket and ratchet, a 6" extension helps, a wrench will also work
-7/16 wrench and socket for catch can mount.
-8mm socket and ratchet for the intake clamps (flathead will also work, but I prefer the socket)
- 7/16 drill bit and drill
-1/4" NPT tap (depends on intake tube, will mention later)
- tubing cutter or other sharp blade to cut tubing.
Time involved: about 45 minutes depending on skill level and where mount the can
Steps:
Step 1- decide where you want to mount your catch can. Keep in mind that you will have 3 lines going to it, and will want space underneath to drain it. I chose the common place of the brake master cylinder stud. So I chose the correct bracket that RX gives you and mount the can to the bracket and then the bracket to the stud. This is held on with a 15mm nut. There was blue thread lock on the stud from the factory so I cleaned and really applied some more when I put it back on.
Step 2- remove the factory pcv line. You will want to remove the line that goes from the front of the motor, which is under the throttle body and slightly to the right (as viewed from the front). This is a push to disconnect so just push the grey tab and pull the line off.
Step 3- Install primary evacuation line. This is your main discharge line of clean air from the catch can. You will pick one of the outer fittings on the can. I chose the closest one. Then, cut and install a short section of hose onto the can and put one of the included check valves, with the arrow facing the motor, inline with the hose then run the remaining distance the the fitting on the intake. Again, be careful pushing the hose on as this is just plastic.
Step 4- Install "dirty" or can inlet line. This is your pcv discharge line. It is the one you removed under the throttle body. Route the hose in the cleanest way you can. I ran mine in the same location as the stock hose was. This goes to the center fitting on the catch can. Do not use a check valve on this hose.

Step 5- Remove intake tube and drill/tap hole for secondary outlet. This is where the install will vary depending on which intake you have. I have the airaid MIT, so this will be the same for most other aftermarket tubes. The stock tube is similar. The idea here is to put the fitting as close to the throttle body as possible. I put mine underneath and used one of the included 90 degree fittings. Once you decide where you want the fitting, make sure it won't interfere with the belt or other lines. Then drill the hold using a 7/16 drill bit. Now tap the hole using the 1/4" NPT tap. I used some Teflon tape on the threads of the fitting for some extra assurance.
Step 6- install secondary outlet hose. This is easy. Just run the hose from the new fitting you put in, to the last fitting on the catch can. Install the other included check valve inline with the arrow facing the intake tube.
At this point you are done with the catch an install. You can clean up the loose hoses with some zip ties then start the truck to make sure you haven't made any leaks. If you bought the clean side separator, keep reading.
Clean side separator install.
Step 1- remove both valve cover breather tubes. These are on the front of ceach valve cover and are the same push to release fittings as before. They run to your intake tube.
Step 2- install the included pre-made valve cover bridge hose. Simply push each fitting onto the valve covers
Step 3- remove stock oil cap. Set the stock oil cap aside and install the included cap with the hole in the center.
Step 4- install the included hose onto the closest fitting on the intake tube. In my case this was the lower fitting on my intake tube. Then run the hose to the clean side sperator and trim to length and push it onto the barb.
Step 5- install the included vacuum cap on the unused fitting on the intake tube. Just a note here, the included cap is really made for the stock intake, so it is a little small for the airaid tube. I will be getting a threaded plug since that will be a cleaner look anyway.
Final step for the project- clean up any loose hoses with zip ties and check for any potential clearance issues with any moving parts.