Subject:
This How-To covers how to tint your tail lights using VHT Nite Shades.
Requirements:
• Skill Level: Anyone
• Time: Couple Hours
• Special Tools: Elbow grease
Things You'll Need
VHT Nite Shades (I purchased mine from Napa)

2000 grit wet/dry sand paper
.JPG")
Krylon Clear Spray Paint

Step-by-Step Instructions:
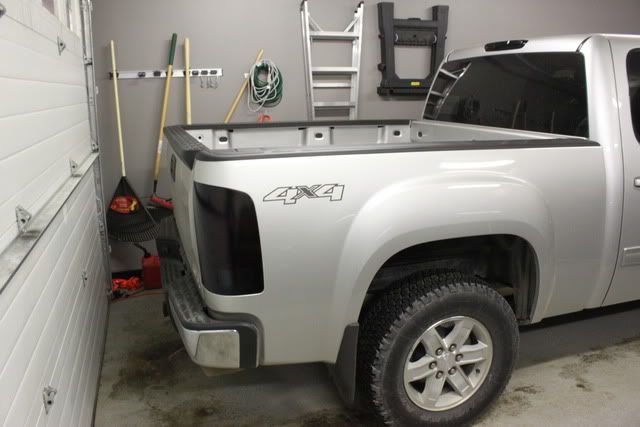
Step 1. Remove tail lights from vehicle.
.JPG")
Step 2. Take your 2000 grit sandpaper and wet your tail lights and sandpaper. Place a few drops of dish soap on the sand paper and wet sand your tail lights till they are a Smokey haze color. In the picture below you can see the left one has been sanded and the right one has not been.
.JPG")
Step 3. Once the tail lights are sanded, clean them with a rubbing alcohol to remove any finger prints or grease from the lenses.
Step 4. Once the tail lights are clean prop them up on a table or flat sturdy surface.
.JPG")
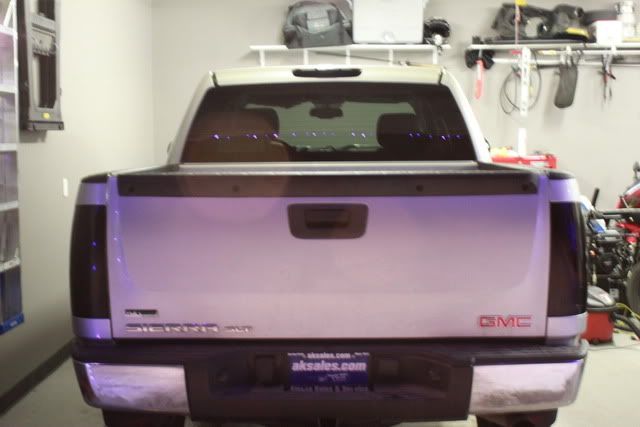
Step 5. Time to start spraying. Shake your can of VHT Nite Shades to make sure it is throughly mixed. Make sure the nozzle is clean of any gunk and do a couple shots on a piece of paper to make sure you have an even flow. Start spraying past the lens and do nice light coats evenly covering the whole tail light. After your first coat wait 5 minutes and then repeat. If you are wanting a Smokey look only apply two coats. If you are looking for the "black out" look apply 3 coats. In this How-To I will be applying 3 coats.
**note - applying 3 coats will render you back up lights useless**
You have a few options to address your tail lights. Before applying your first coat you can mask off the back up light section which will result in that remaining clear when done. Second option is applying 1 or 2 coats and then masking the back up section. 1-2 coats will still allow enough light through.
I will be purchasing after market lights that plug into the trailer hitch to help with lighting when backing up.
In this picture I just applied the first coat. You should wait 5 minutes between each coat.
.JPG")
Step 6. Second coat (remember to wait 5 minutes between coats)
.JPG")
Step7. Third Coat (wait 10 minutes till applying clear coats)
.JPG")
Step 8. After the last coat of VHT wait 10 minutes and it will be time to start the clear coat process. This process is the same as applying the VHT. Light even coats and waiting 5 minutes between coats.
Step 9. Once the clear coat is done allow it to dry and set (usually a couple hours).
Step 10. Very lightly wet sand the lenses making sure to keep your strokes in the same direction and to not press very hard. When done your lenses should have a light hazy color to them.
.JPG")
Step 10. Get some rubbing compound and an application pad. Apply a generous amount to the pad and evenly spread it across the lens. Once you have a nice even coat its time to put in some elbow grease and go nuts. Rub the compound in as hard as you can, you are wanting to fill in all the fine scratches from wet sanding.
Step 11. Once you are done applying the rubbing compound take a microfiber cloth and buff out the lenses to a nice glassy look. If there is still minor scratch marks repeat the rubbing compound process.
Step 12. Install the lights back on the vehicle and admire your work.
![Image]()
![Image]()
Conclusion:
Very easy mod, just make sure you take your time and don't try and take any short cuts. It was getting late when I finished up my project so will be adding more pictures tomorrow and also will be making a video showing them lit up at night.
This How-To covers how to tint your tail lights using VHT Nite Shades.
Requirements:
• Skill Level: Anyone
• Time: Couple Hours
• Special Tools: Elbow grease
Things You'll Need
VHT Nite Shades (I purchased mine from Napa)
2000 grit wet/dry sand paper
Krylon Clear Spray Paint
Step-by-Step Instructions:
Step 1. Remove tail lights from vehicle.
Step 2. Take your 2000 grit sandpaper and wet your tail lights and sandpaper. Place a few drops of dish soap on the sand paper and wet sand your tail lights till they are a Smokey haze color. In the picture below you can see the left one has been sanded and the right one has not been.
Step 3. Once the tail lights are sanded, clean them with a rubbing alcohol to remove any finger prints or grease from the lenses.
Step 4. Once the tail lights are clean prop them up on a table or flat sturdy surface.
Step 5. Time to start spraying. Shake your can of VHT Nite Shades to make sure it is throughly mixed. Make sure the nozzle is clean of any gunk and do a couple shots on a piece of paper to make sure you have an even flow. Start spraying past the lens and do nice light coats evenly covering the whole tail light. After your first coat wait 5 minutes and then repeat. If you are wanting a Smokey look only apply two coats. If you are looking for the "black out" look apply 3 coats. In this How-To I will be applying 3 coats.
**note - applying 3 coats will render you back up lights useless**
You have a few options to address your tail lights. Before applying your first coat you can mask off the back up light section which will result in that remaining clear when done. Second option is applying 1 or 2 coats and then masking the back up section. 1-2 coats will still allow enough light through.
I will be purchasing after market lights that plug into the trailer hitch to help with lighting when backing up.
In this picture I just applied the first coat. You should wait 5 minutes between each coat.
Step 6. Second coat (remember to wait 5 minutes between coats)
Step7. Third Coat (wait 10 minutes till applying clear coats)
Step 8. After the last coat of VHT wait 10 minutes and it will be time to start the clear coat process. This process is the same as applying the VHT. Light even coats and waiting 5 minutes between coats.
Step 9. Once the clear coat is done allow it to dry and set (usually a couple hours).
Step 10. Very lightly wet sand the lenses making sure to keep your strokes in the same direction and to not press very hard. When done your lenses should have a light hazy color to them.
Step 10. Get some rubbing compound and an application pad. Apply a generous amount to the pad and evenly spread it across the lens. Once you have a nice even coat its time to put in some elbow grease and go nuts. Rub the compound in as hard as you can, you are wanting to fill in all the fine scratches from wet sanding.
Step 11. Once you are done applying the rubbing compound take a microfiber cloth and buff out the lenses to a nice glassy look. If there is still minor scratch marks repeat the rubbing compound process.
Step 12. Install the lights back on the vehicle and admire your work.
Conclusion:
Very easy mod, just make sure you take your time and don't try and take any short cuts. It was getting late when I finished up my project so will be adding more pictures tomorrow and also will be making a video showing them lit up at night.