Chevy Silverado and GMC Sierra Forum banner

silentbravo's 2001 GMC Sierra 2500HD

92K views 367 replies 43 participants last post by  RedSLEd  
#1 · (Edited)
Bought the truck Sep. 2015 with 115k~ miles

Mod List below

Wishlist: Completed in Green
Audio overhaul:
New speakers front/back, amp, double DIN conversion with Kenwood multimedia head unit, sound deadening
Electrical: New HO Alternator, Big 3, rear backup camera, maybe a front security cam, adding steering wheel audio controls, maybe 2nd battery, extra backup lights + switches, auxiliary gauges
Performance: E-fans, custom tune, Long tubes + full exhaust, Airaid MIT, and beyond?
Extras: Wheels, tow mirrors, AMP Research steps

Updated Wishlist (and goals for completion 2023-2025)
Performance:
Rebuild engine Spring 2024, Full exhaust Spring/Summer 2024, LSA supercharger Fall/Winter 2024???
Suspension: Track bar of some sort, New shocks higher end Fox or better?, Coilover front suspension (torsion bar delete) 2025+
Maintenance: Rebuild 4l80e transmission for big power Summer/Fall 2024


Updated Picture from 2023
Image


Updated Picture from 2020
Image


Here She Be When I bought:
Image

Image
 
#335 ·
#336 ·
Replaced starting battery 12-16-2023

My battery made it just about 4 years and it's not actually dead just getting a little weaker and was starting to leak/vent too. My TopDon charger estimated it had about 30% cranking power left which was still fine to start in 20 degree F temperatures.

My previous battery ACDelco 78DTPS, see the corrosion on the negative terminal.
Image


I replaced with the "same" model, which is actually a superceded model ACDelco 78DTG. It has a longer warranty now, 42 months compared to the 30 on the previous which is nice. 790 CCA on the new model vs 800 CCA on the old.

A couple of comparison pictures here
Image


Image


Cleaned up the terminals with a baking soda bath (the battery tray too which was nasty) and installed the new battery.
Image


Good to go for 4+ years I hope.

Installed REDARC Tow-Pro Elite trailer brake controller 12/17/2023

I saw a review of this on this forum, (here https://www.silveradosierra.com/threads/installing-the-redarc-tow-pro-elite-v2.742514/) and this brake controller looked really nice. I'm especially interested in how the proportional braking works as it sounds like it should make towing very seemless. Also deleting that big traditional controller from the knee area, where it was hard to reach, is another huge bonus.

Here is (most) of what was in the box. Black box module, 2 wiring harnesses, large and very detailed instruction book, additional mounting addendum, quick guide, sticker, a nice mounting plate if you need and the parts for the switch/rotary knob which I have already mounted in this picture.
Image


Install was fairly easy, you just secure the black box to a hard point, plug in the wire to the braking dial, and connect the other harness to your factory connector.

I mounted the dial under my cargo lamp button, easy access and out of the way. Looks like it was meant to go there.
Image


Just a little bit of hole drilling and dremel action to open up the back, easy fit.
Image


Added terminals to the included harness and wired directly to my brake controller connector, wire loomed it up nice.
Image


Finished install
Image


Now I just need an excuse to tow a trailer and see how it works haha. I better stop looking at Copart or I may be making a trip for a parts rig.... that I don't need.
 
#337 ·
Ha, found an excuse to tow a trailer, bought a cheap cargo trailer to store some of my random parts lol. I only had to drive about 1 mile to get it so not much of a test of the brakes but the controller seemed to work... The lights lit up and the trailer didn't feel like any extra weight on me really, but it's also pretty light.


Got some work done though

DEEZEE tailgate assist installed 12/30/23
Christmas gift, easy to install seems to work good, part# DZ43100
Image


Boost Auto Tow Mirrors installed 12/31/23
I had the mirror caps painted at the local body shop. $141.46 for 4 pieces of plastic :( When I added up the paint supplies I was going to use it was going to be almost half that cost to do it "right", plastic primer/adhesion promoter, color match paint, 2k clear coat. It's winter and I don't have anywhere to paint so whatever, I sourced it out. Came out nice though.
Image


Image


Truck's to dirty so I only took the one picture
Image


Here's the first real test of the heated glass. Lower completely cleared, upper cleared the ice but moisture remained. I would have to click the defrost button twice to totally clear it probably. I think the defrost runs for 10 minutes.
Image


I have mixed feelings about them so far. Since I sit so high up in the seat I have to angle the glass quite a lot so the corner sticks out (not a big deal just unsightly). Strangely, it seems like the upper glass has less visibility than my stock mirrors, even though the stockers were only slightly wider. The lower is really nice though, love that I can see my back tires and bumper area there.

Both of the upper glass are distorted and I will contact Boost Auto about it. I was kind of expecting that they sent good glass with these being a "premium" product. I would absolutely expect the cheap distorted mirror glass on the lower cost knock offs. These are just more expensive knock offs with a few upgrades and probably good customer service from what I've read.

I'm going to ask if GM OEM glass is compatible and may just buy some of those. I expect they will send me a new set of uppers no problem, but whether they are any better... What good are fancy cool looking tow mirrors, if you can't even use them properly. They're a safety/utility item before they are a status item and need to function properly.

This summer I will probably see about leveling them out some, they have the angled look out of the box. Also the turn signals on the mirror glass are SUPER bright, coming home tonight they are a bit crazy. Hopefully I get used to that, or maybe the GM glass will be less flashy, will see how that goes.

On a very positive note....
Installed the front door woofers Polk DB6501 12/31/2023
Ran the wiring from my crossovers to the speakers screwed them back in. I already had the DB652 coaxial speakers in there with the same hole pattern so it was simple to replace.
Image


Image


Now it's a big difference going from the 22w (shared power) head unit powered speaker to the 50w dedicated amp channel output, and I actually have a nice balanced midrange now. Even untuned it sounds really good, but I need to go over the amp and tune it for sure. Maybe download some test tones and dial it in right. That's going to be my next small adventure.

The doors still need to be sound treated and I want to build some speaker rings to mount the front speakers to, then I will surround them in foam rings to seal the speaker to door card gap.
Image


I probably won't bother with sound treatment till summer.

Next major projects will be mockup for the fuel system and install, also setting up the wideband, and tune for boost/changes. I will have to install the TBSS intake when I do the fuel system because I'm changing to returnless style (if everything works as planned). I already have NNBS (square port) truck intakes as well, so I will toss one of those on the rebuilt engine to get it driving again, then supercharger later after the bugs are worked out and broken in, etc.

Hmm I guess I need to do the exhaust at some point as well, but I guess that can happen whenever really.
 
#338 ·
I'm thinking all the added insulation in the cab has done some good. Especially on the longer trips I have done, I can turn the HVAC way down and the heat doesn't have to be on all that much to maintain a comfortable temp inside (this is when it's cold out).

I figured out on my side window defrost vent quirks. If i am at full heat, they blow less, must be quite a restriction to force all the air through the heater core. As soon as I adjust up to where it blends in some cool air, the pressure from all the defrost vents goes up and moves more air.

And another trick I've been trying is to keep at least one window cracked a little bit after I get home. The truck ends up at home nice and warm in the cab with whatever freezing/cold temps outside and If I keep all the windows sealed it has a tendency to condensate on the inside windshield. Then when it's really cold out, that condensation inside can freeze by morning.. and that is super lame. If I leave the window cracked it lets the air equalize better and seems to not condensate inside.

It doesn't even need to be much of a temperature difference for that to happen either. There will be water in the floor mats from snowy boots and stuff that just has to escape somewhere and if it can't get out then it likes the windows....

Plus when the windows are completely up, they freeze in that position. That's one of the negatives of this truck, windows froze in up position. I'm not sure if it's just this truck or GMT800s in general or just the way it is with winter.
 
#339 ·
My side window defrost vents dont work all that well either, I'm going to try blending in some cold air to see if that helps.

That's true about leaving your window cracked(if you have rain guards lol). I used to park somewhere more sheltered so I was able to leave my windows cracked so like you say, I'd have less condensation. Also if my window was frozen I could crank it up a small amount first to break the ice seal before rolling it down. I tried to roll the window down on my old truck once when frozen and the window regulator went down but the window stayed up lol. Problem is if it's a snowy windy day my truck will fill up with snow if they are left down even with the rain guards so I dont tend to leave them cracked anymore.
 
#340 ·
Your truck should be automatically turning on the a/c system (so the air goes through both the condenser and the heater core) to dry the air when the hvac system is in defrost mode.
 
#342 ·
I'm excited I got tracking information on my Jake's Performance order. I wonder if it will be the converter and the transmission rebuild parts, or one or the other. I made the order around Black Friday... so their 6-8 week timeframe to ship is pretty accurate.
 
#345 ·
Got a few things in today. Big box of stuff from Jake's Performance, all the goodies for the Stage 4 rebuild. There was no converter, so that must be shipping separately. I also got a replacement filter from S&B for my Banks intake box. I'm not sure I even posted about that...

I bough a Banks Ram-Air cold air intake, it's a full replacement box, filter and tube. I was mostly interested in the box/filter combo since I will need to build a custom tube for the LSA blower anyway, but after watching long enough the whole kit came on discount on Amazon for to cheap to pass up. Unfortunately the kit included the Oiled filter, and I don't want to mess with that nonsense, so I had to buy a dry filter separate. S&B makes a "clone" of the Banks filters for a good amount cheaper, so that's what I went with.

Here's the Banks CAI Banks Ram-Air®
Here's the S&B filter I just got, S&B CR-42138D

I can toss this on anytime now, since it will fit my stock intake. Once the weather turns a bit better I will get more motivated to do some stuff on the truck.
 
#348 ·
Yeah the car hobby is not particularly cheap.
Fast. Cheap. Reliable. Pick 2, definitely applies here.

I thought about building a closed intake box, by the time I would buy a big cone filter and materials it wouldn't necessarily be cheap either. Since I also try to make stuff nice fitting and looking and functioning small projects tend to be time sinks.
 
#349 ·
Just a few Jake's Transmission parts. I didn't unwrap everything, it was packaged nicely and the parts need to stay together in that box.

Seals and gaskets
Image


Filter
Image


Power holder 9000's (pretty sure that's the technical term)
Image


Bushings
Image


Bag of parts
Image


Hub clutch (box)
Image


Spinny things
Image


Frictions and steels
Image
 
#350 ·
Denali seat swap 2/10/2024

I picked these up for $150. These came from a 01 or 02 Denali and are in pretty good shape. The leather is wearing down a bit on the driver and a small rip but overall still in nice shape. Everything works. I cleaned them up a little bit and threw them in (minus the connector rejigging). The headrests are kind of strange but I don't really mind. They can be swapped I think.

As I bought them
Image


Here's the adapter connector I made to go from my power cloth seat to the 12 pin connector on the power/heated seat.
Image


Image

Image

Image


These look really nice in my truck. Colors match perfectly. I don't necessarily care for the leather over cloth but after driving in my Tahoe with the 6 way power seats I was really sold on the extra adjustments. Really the only thing extra over my cloth seat is the side bolster adjustment, but I really like that feature. I can pump that up and squeeze the side of my back a bit for extra support.

I'm hoping I can recover and rebuild the seats at some point anyway. There is a retrofit kit that adds heat/cooling that I would absolutely add with new covers but using one of those "seat builder" sites the quote for basically top of the line leather covers is about $2000. I probably wouldn't recover the back seat to save money on that quote, but I'm not quite at the point to be dropping that kind of money on seats. I should probably get a good alarm/remote start system installed before that point, as the truck will be worth that precaution.
 
#352 ·
Looks great! In the meantime, stitch-up that tear in the seam so it won't get any worse.
 
#354 ·
What, no duct tape patch? 😁

Leather in the sun = Who brought the roasted nuts?

Leather in the winter = I heard you like to sit on an ice cube first thing in the morning

Leather does clean much better. Cloth does get warm in summer but that's what A/C is for, especially if I put A/C in the seat.

These are what I want to install Sanctum Seat Ventilation System - LeatherSeats.com
 
#358 ·
Of course it's not all fun and games with a 23+ year old truck.

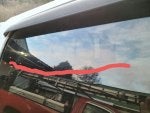
I guess the rear passenger window broke?
Really hard to take a picture of that, but it's above the line I drew.

I think I actually heard this pop a night or 2 ago going home. Sounded like a rock hit the window back there, but I didn't pay attention to it because there's no reason a rock should be hitting anything on the side like that..

I didn't think I had my subwoofer turned up THAT much, although I may have cranked it up a little bit. Coincidence? Maybe... maybe not.


Also my steering column is popping now, probably one of those notorious plastic bushings gave out.

Guess I'll watch for a part out truck for the window. Actually I have an 04 suburban door, maybe it's the same.
 

Attachments

#360 ·
Ok it isn't actually broke just a really noticeable scratch. Not sure how that happened though. I saw it the other day because I was scraping ice off and the scraper was catching on it. It's been a super mild winter so I haven't had to scrape that window for several weeks now, and probably would have noticed it before. Oh well

I need to polish all of my side windows anyway, the fronts are super scratched up. The turn signal in my mirrors are amplified like 10x larger because the scratches pick up the light. Luckily the replacement GM glass on driver side has a toned down turn signal, just a little bit, so that helped.

So that will go on the list for the summer, door glass revitalization.

Tuned my amp today with a proper tool, SMD DD-1 Distortion Detector. Have the gains dialed in, sounds amazing. Funny for the first 2-3 months or more I had the gains turned backwards (all the way up) because the numbers seemed to look like that on the dial... lower number to higher number, so I thought lower number = lower gain. Wrong on this amp. Didn't seem to hurt any equipment that I know of, I never had it turned up excessively loud anyway. That was why I had the audible hissing at all times though.

This head unit can go all the way to max volume with no distortion, but when adjusting gains the A channel would barely accept any gain without distortion, B channel would go up like 60% gain before distortion and that didn't seem right. I backed the volume down to 32/40 and adjusted gains again, both now go up into the 70% range. Subwoofer also went into the 70% range before distortion. It starts to get quite loud in the cab around mid 20s volume now, so 32 volume will be like... hearing aids in your future.

Somehow one of the amp's speaker wire bolts escaped my truck and It was making me mad that it disappeared. I must have looked for half an hour and was moving all sorts of stuff in the truck, found it on the other side of the truck like 4ft away from the cab.... other than that, tuning was pretty simple.
 
#362 ·
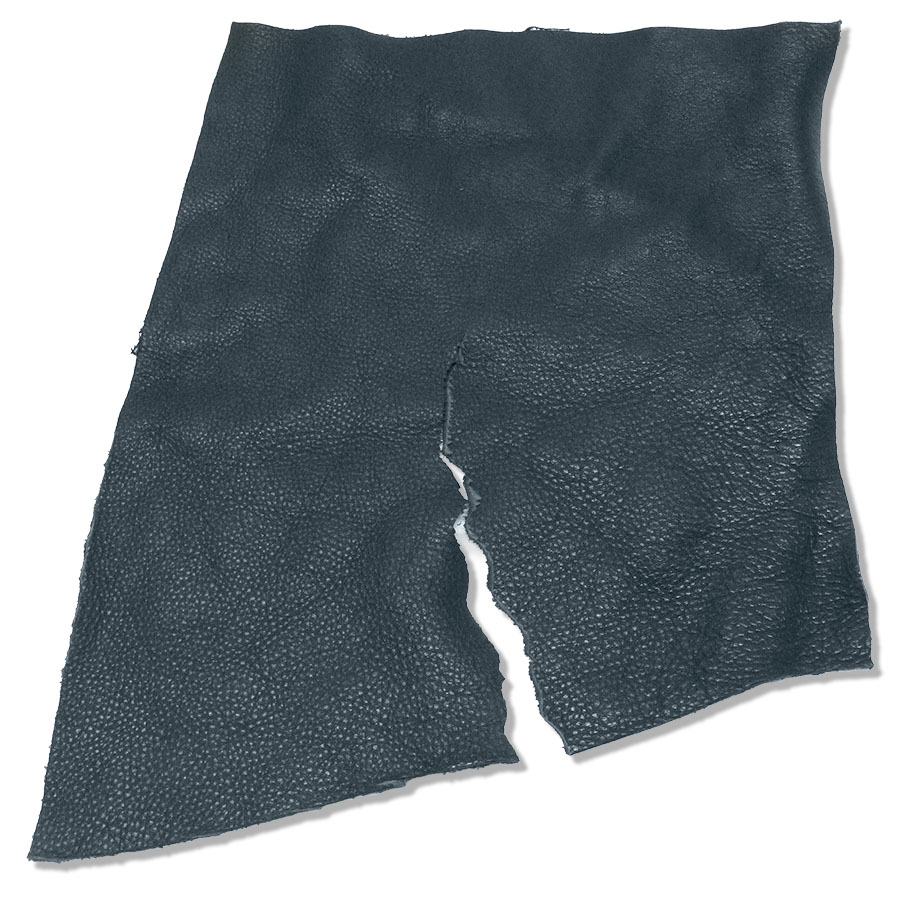
@silentbravo those Denali seats look great. That leather doesn't look too worn either, so it should be possible to rehab them quite easily with some color balm (Clyde's is good) and light sanding (2000-4000 grit). As to the small tear, I'd try a repair before totally recovering them. If you pull the seat cover off it's a lot easier. It should be possible to use a sub patch. You'll see a bunch of "repair kits" out there using non woven fiber. But usually it works better, and is more durable to just glue a scrap of 2oz leather behind the tear on the inside (Hobbylobby usually has bags of scrap for a few bucks). Given the location; a scrap that is at least 2" bigger than the torn area all around would be best. A good contact glue on both pieces should hold up well. On the outside along the tear I'd use a water resistant wood glue like Titebond II. It shouldn't be super noticeable after some scuff sanding (again high grit) and Heavy leather filler. Here is a video on the basic process for rehabbing (he's demoing this on a BMW...but you get the gist).


For the leather repair, I'd follow these instructions rather than the you tube videos that involve a repair kit. I've found contact cement to be the easiest way to make these repairs rather than dedicated leather glues, but YMMV.


Keep up the great work!